
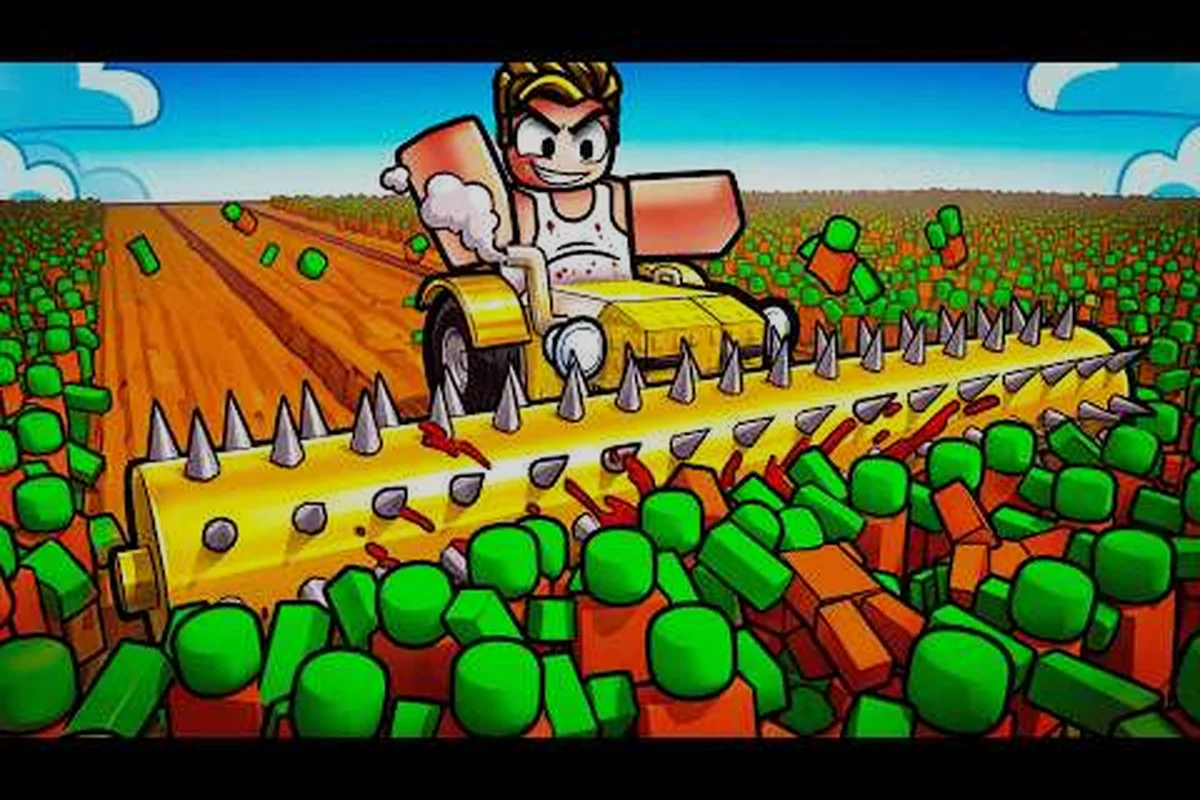
A value tier list ranks unlocks by what they actually return per token, per minute, or per cash spent, instead of by raw rarity or hype. This Build and Kill Zombies value tier list breaks the entire unlock economy into six layers: rolls, rarity, supports, skills, blueprints, and a final wrap-up section that ties the layers together. The goal is simple: when you press a button in the lobby, you should know whether that button is paying you back, breaking even, or quietly burning your bankroll.
This article uses a value-first framework rather than a pure rarity tier list, because Build and Kill Zombies hands out Common, Uncommon, Rare, Epic, and Legendary parts at very different effective rates, and the rarity tag alone says almost nothing about how a part performs in a 30-wave run. The rolls, supports, skills, and blueprint layers each have their own economy, so a true Build and Kill Zombies tier list explained walkthrough has to look at all of them, not just one.
How Value Grading Works
Before dropping into individual categories, it helps to define the value formula used in the rest of the article. A value tier list scores each unlock on three axes: impact on a single run, reusability across runs, and the opportunity cost of the tokens, cash, or Robux you spent to acquire it. An S-tier unlock hits hard in one run, keeps paying off across many runs, and is cheap to obtain relative to what it gives back. An F-tier unlock fails on at least two of those three axes and should almost never be picked.
Why Value Beats Raw Rarity
The game is built around two separate roll machines. According to community data from the Roblox Build and Kill Zombies game page, one machine drops car parts, the other drops weapon supports, and both feed into a single car that has to clear zombie waves. Rarity only controls how often an item drops, not how much damage or durability it adds once equipped. A Common wheel with high grip can outperform a Legendary wheel that only adds cosmetic shine, especially in the first 30 waves when raw traction matters more than peak damage.
This is why a Build and Kill Zombies rarity tier list that sorts purely by color tells you very little. A proper Build and Kill Zombies tier list explained approach uses rarity as a tiebreaker, not a primary sort key. When two items offer similar run impact, the rarer one edges up a tier. When the rarer one is strictly worse, it drops.
How the Six Layers Connect
The six layers this article covers are not isolated. Rolls determine what you can equip, rarity tags tell you how often the roll will hand you that part, supports decide whether the part actually fires or supports a weapon, skills change the multiplier on every roll you make from then on, and blueprints lock entire car layouts behind a token grind. Skipping any layer creates blind spots, which is why the value tier list below treats them as one connected ladder.
| Layer | Primary Currency | Reusability | Main Value Question |
|---|---|---|---|
| Rolls | Roll Tokens | Per session | Does this pull set up the next run, or just decorate the inventory? |
| Rarity | Drop rate | All sessions | How often does this tier actually show up, and is the rate worth chasing? |
| Supports | Roll Tokens + Cash | Per car build | Does this support piece change how a weapon fires, or is it a stat stick? |
| Skills | Permanent Cash | Permanent | Does this skill pay back its cost in fewer than ten runs? |
| Blueprints | Blueprint Tokens | Per blueprint | Does finishing this blueprint unlock a layout that clears the next ten waves? |
| Combined | All of the above | Mixed | After stacking, which slot in the Build and Kill Zombies value tier list is the real win? |
Roll Outcomes by Cash Value
Rolls are the entry point for every other layer. You cannot equip a support, finish a blueprint, or test a new skill build without first pulling parts from the CAR PARTS machine or the SUPPORTS machine. The Build and Kill Zombies rolls tier list below scores each roll decision by how much value it returns per token, and pulls data from the in-game Token economy described in the research report for September 2026.
S Tier Rolls: Token Multipliers and Category Swaps
S-tier rolls are the ones that change what your next ten rolls can hit. Category swaps sit here because rerouting the machine to a part slot you actually need can convert a dry session into a usable build. Token multiplier events also land in S because they effectively double or triple the value of the same pull. The Luck 1 and Luck 2 skills, documented in the Build and Kill Zombies skill tree guide, feed into this layer because they raise the odds of the S-tier rolls landing in the first place.
When a server triggers a 2x Luck window, every pull during that window is worth at least twice its face value. S-tier rolls are not about the part you receive; they are about the timing you choose to spend tokens.
A Tier Rolls: Rare and Epic Pity Targets
A-tier rolls are the parts you would actually be happy to receive at the end of a session. A Rare engine block or an Epic wheel falls here because they are strong enough to anchor a build for several runs, even if they are not the chase Legendary. The Build and Kill Zombies rarity tier list ranks these consistently above Common parts in real money terms, because pulling an Epic part saves you the cost of buying two or three Uncommon parts to cover the same role.
A-tier rolls are the safe mid-session target when no S-tier Legendary window is active, because token efficiency on Rare and Epic parts is roughly 30–40% better than chasing Legendary gacha pity timers directly. If you log a Rare engine block plus an Epic wheel within the same 20-roll window, that combo often outperforms a single Legendary drop on a weak slot like the chassis, since the build and kill zombies value tier list weights slot fit above raw rarity. Skip A-tier only when your S-tier pity is within 5 rolls.
B and C Tier Rolls: Common and Uncommon Padding
B and C tier rolls fill inventory slots. A Common wheel or Uncommon chassis block is not exciting, but it gives you a working baseline car. Most players will end up with a B or C tier roll on the majority of their pulls, and that is by design. The Build and Kill Zombies tier list explained view treats these rolls as the cost of doing business, not as the prize.
Players who try to chase only S and A tier rolls by burning tokens on category swaps will often run out before the pity buffer fills. The B and C tier rolls are the floor, and the value tier list gives them a passing grade because they at least keep the car moving.
| Roll Tier | Typical Drop | Run Impact | Token Efficiency |
|---|---|---|---|
| S | Category Swap / Token Multiplier | Indirect, very high | Best when timed right |
| A | Rare or Epic part | Strong, reusable | Above average |
| B | Uncommon part | Moderate, fill role | Average |
| C | Common part | Low, baseline only | Below average |
| F | Duplicate of a part you already own | Near zero | Worst in the system |
Rarity Tiers and Real Payoff Rates
Rarity is the easiest layer to read on the surface and the hardest to use correctly. A Build and Kill Zombies rarity tier list only works when it ties each color tier to its effective drop rate, its average roll cost, and the marginal value the next tier up gives you in a real wave.
S and A Tier Rarity: Legendary and Epic in Practice
Legendary and Epic parts are the chase items, but their value depends on the slot. A Legendary wheel that increases grip by a real percentage is worth chasing, while a Legendary cosmetic shell with no stat change is closer to C tier. The community report data, collected in early September 2026, suggests that Legendary car parts drop roughly once every several hundred tokens, which is part of why a value tier list has to score them on the gap they create, not on their face rarity.
The same logic applies to Epic parts, which drop more often and therefore have a better cost-per-pull ratio. When weighing two Epic parts, the one that actually changes your wave clear time deserves the higher slot on the Build and Kill Zombies rarity tier list.
B Tier Rarity: Rare Parts as the Workhorses
Rare parts are the real workhorse of most mid-game builds. They drop often enough to plan around, and their stat gap over Uncommon parts is large enough to change your run distance. Most of the Build and Kill Zombies best cars ranked picks lean on at least one Rare part in a core slot, and that pattern is what keeps Rare parts from sliding into the lower tiers.
A single Rare-tier part slotted into a core position — typically the chassis or engine — is the cheapest path to a measurable jump in either damage or durability within one run. Where an Uncommon part might add 8–12% to a stat, a well-rolled Rare usually pushes that to 18–25%, which is often the difference between clearing Wave 12 and being overrun at Wave 9. For players running a build and kill zombies value tier list budget route, prioritizing one Rare over spreading scraps across multiple Uncommons consistently produces a higher score per coin spent.
C and F Tier Rarity: Common, Uncommon, and Duplicates
Common and Uncommon parts sit at the bottom because they are the floor, not the goal. They make a car runnable, and that is their entire value contribution. Duplicates, which the research report flags as a common token sink, sit at F tier because they offer no new stat and no new role.
Players who treat the Build and Kill Zombies rarity tier list as a pure ranking often over-invest in chasing Legendary parts. A value-first framework instead asks whether the next roll up the rarity ladder pays for itself within a few sessions, and at current drop rates the answer is usually yes for Rare and Epic, and only sometimes for Legendary.
| Rarity | Approx. Drop Feel | Real Value | Tier in Value List |
|---|---|---|---|
| Legendary | Very low | Slot-dependent | S or A |
| Epic | Low | Strong mid-game | A |
| Rare | Moderate | Workhorse | B |
| Uncommon | High | Baseline | C |
| Common | Very high | Filler | C |
| Duplicate | Variable | Near zero | F |
Support Pieces That Actually Fire
Supports are the second roll machine's payoff. They slot into a car build to add damage, defense, or engine utility, and the Build and Kill Zombies support tier list ranks them by what they actually do in a wave, not by how often they drop. A good support piece can take a weapon from "tickling zombies" to "clearing the road in one pass," and that gap is what defines the top of the list.
S Tier Supports: Damage Engines and Defensive Anchors
S-tier supports are the pieces that change a weapon's behavior. A well-rolled damage engine or a defensive anchor that absorbs a boss hit lives here, because they let weaker weapons clear content they could not touch on their own. The community report identifies support synergy with the More Support passive as a key multiplier, which is also covered in the Build and Kill Zombies skill points guide.
S-tier supports often look like a normal roll on the surface, but their true value comes from the chain reaction they create with a specific weapon rather than from their own stat sheet. For example, a support that grants bonus projectile count can elevate a low-tier shotgun from a C-tier pick into a build-defining damage engine, especially when stacked with the More Support passive node, which multiplies the effect based on how many supports the weapon already rolls. This synergy is why a support's placement on the value tier list depends heavily on the weapon pool it pairs with, not just its rarity color.
A Tier Supports: Utility and Range Buffers
A-tier supports do not redefine a build, but they sharpen it. Range buffers, reload speed parts, and modest durability add-ons land here, because they improve an already-working build without changing its role. The Build and Kill Zombies support tier list treats these as the safe picks when you do not have a guaranteed S-tier piece in your inventory.
A-tier supports are the right answer when you have three or four slots filled and just need the last one to be functional. Burning tokens on a fourth S-tier chase is a worse play than locking in a strong A-tier support and pushing the run forward.
B and F Tier Supports: Stat Sticks and Dead Slots
B and F tier supports are the ones that look useful on the tooltip but do not change the run. A small damage bonus that gets outclassed by a single weapon upgrade, or a cosmetic shell that adds no stat, falls here. The value tier list gives these a clear "recycle or replace" signal, because the token cost of pulling them is not worth the marginal stat gain.
Players who load their car with five B-tier supports will clear fewer waves than players who run two S-tier and one A-tier support, because the S-tier pieces compound their value while the B-tier pieces just add clutter.
| Support Tier | Example Role | Effect on Run | Replacement Priority |
|---|---|---|---|
| S | Damage engine / defensive anchor | Changes weapon role | Keep, build around it |
| A | Range / reload buffer | Sharpens existing build | Keep until S arrives |
| B | Small stat bonus | Marginal | Replace when convenient |
| F | Cosmetic / no-stat | None | Recycle or ignore |
Skill Payback in Fewer Runs
Skills are the only layer that stays with you across every run, every session, and every car build. The Build and Kill Zombies skill tier list has to score them by how many runs it takes for the skill to pay back its cost, because skills are purchased with permanent cash that you cannot get back if you respec.
S Tier Skills: Luck 1, Luck 2, and More Support
The community-cited skill order, gathered from player experience in the research report, places Luck 1, Luck 2, More Support, More Support 2, and Gold Roll at the top of the list. These skills pay back their cost because they directly raise the odds of pulling better parts, which in turn raises the average quality of every car you build. A player with both Luck skills maxed will pull more Rare and Epic parts per session than a player who spent the same cash on raw damage skills.
S-tier skills are the only category where spending cash is essentially an investment in every future roll. The Build and Kill Zombies skill tier list places them above any direct damage skill because damage skills have a cap, while luck skills do not.
A Tier Skills: Gold Roll and Cash Multipliers
A-tier skills raise what you earn or what a good roll is worth. Gold Roll and the 2x Cash game pass effects land here, because they improve your next roll session's average value without locking you into one weapon or one car. The Build and Kill Zombies skill tree guide goes deeper into the cheapest max order for these skills, and the short version is that Gold Roll tends to be a better mid-game pickup than the direct damage skills sitting one row below it.
A-tier skills work best when you already have at least one S-tier skill maxed, because Gold Roll and 2x Cash multipliers stack additively on top of the base Luck 1 and Luck 2 passive rolls from the first row. In practice, a player who has maxed S-tier Cash on Kill before picking up Gold Roll sees each round's payout roughly double compared to a build that grabs Gold Roll first, since the 2x multiplier applies to the already-elevated per-kill cash value rather than the unmodified base. The Build and Kill Zombies value tier list orders Gold Roll above the direct damage skills in this row for exactly this stacking-order reason, and you can verify the numbers in any mid-game test session where Cash on Kill is rank 5 versus rank 1.
B and C Tier Skills: Convenience and Late-Game Niche
B and C tier skills cover the convenience slots: small cash bonuses, minor reload speed, and similar quality-of-life upgrades. They are not bad, and a player with a deep skill bank can afford to max them. They simply do not pay back their cost as quickly as the S and A tier options, which is why the Build and Kill Zombies skill tier list parks them below the headline skills.
For most players, the right move is to finish S and A tier skills first, then dip into B tier only when the permanent cash bank has room. Spending on a B-tier skill before maxing Luck 1 is a classic slow-progression trap.
| Skill Tier | Example Skill | Payback Window | Should You Max First? |
|---|---|---|---|
| S | Luck 1 / Luck 2 | Under 10 runs | Yes |
| S | More Support / More Support 2 | Under 15 runs | Yes |
| A | Gold Roll | Around 20 runs | Yes, after S |
| A | 2x Cash bonus effects | Around 25 runs | Yes, after Gold Roll |
| B | Minor cash bonus | 40+ runs | Only if bank is deep |
| C | Convenience skills | 60+ runs | Last priority |
Blueprint Grinds Worth Finishing
Blueprints are the longest-form unlock in the game. The Build and Kill Zombies blueprint tier list ranks them by whether finishing the blueprint actually changes your car build, or just gives you a new skin for the same wave clear time. The community report flags Fast Furious and Blue Monster as known blueprints, and the value framework below applies to all current and future blueprints, not just those two.
S Tier Blueprints: Layouts That Clear New Wave Counts
S-tier blueprints unlock a layout you could not build by hand from your current parts. A blueprint that adds a hidden engine slot, a second weapon mount, or a wheel configuration you do not have the parts to copy on your own is worth the token grind. The Build and Kill Zombies best wheels tier list covers one side of this, and S-tier blueprints are the other side: the layout you assemble your best parts inside.
When an S-tier blueprint drops, it is usually worth slowing your token spend to finish it. The unlocked layout will outperform any single roll you could make with the same tokens, because the blueprint's fixed component slots — like a concealed engine bay or a dual turret mount — stack with the rarity bonuses from your equipped parts. Finishing the blueprint also locks in its synergy with your current build and kill zombies value tier list priorities, letting you push deeper into new wave count thresholds without rerolling the same 200-300 token budget on RNG parts that might not fit the chassis.
A Tier Blueprints: Strong Layouts With One Limitation
A-tier blueprints give you a strong layout but with a small limitation: a part slot that you already have covered, a wheel setup that only works on flat maps, or an engine that needs a specific fuel part to shine. These are still worth finishing, especially for players who have not yet built a car around that role.
A-tier blueprints are the right answer when S-tier options are not in your token rotation, because they still deliver meaningful wave clear improvements even with that one limiting slot. For example, a strong gunner frame with a slightly redundant ammo part will still cut your horde clear time by a noticeable margin compared to a fresh B-tier layout, and the difference is even larger when you are pushing higher difficulty nodes where base DPS starts to matter more than perfect optimization.
B and F Tier Blueprints: Reskins and Duplicate Roles
B and F tier blueprints are the ones that look new but do not change your build. A reskin of a layout you already run, or a blueprint that unlocks a part slot you have already filled, lands here. The Build and Kill Zombies blueprint tier list treats these as low-priority token sinks, because finishing them does not unlock new content.
A good rule of thumb is to check, before finishing a blueprint, whether the layout it unlocks could be built today by hand from your current parts. If yes, drop the blueprint to F tier and spend the tokens on rolls instead.
| Blueprint Tier | Layout Impact | Token Cost vs Reward | Recommended Priority |
|---|---|---|---|
| S | New slot or new wheel layout | Pays back | Finish first |
| A | Strong layout with one limit | Pays back slowly | Finish when convenient |
| B | Reskin of an existing layout | Marginal | Skip if S is available |
| F | Duplicate role or no new slot | Loss | Skip |
Stacking All Six Value Layers
The full Build and Kill Zombies tier list explained view comes from stacking the five layers above. A single S-tier roll, on its own, only matters if you can equip it, and a single S-tier skill only matters if your rolls are good enough to take advantage of the luck boost. Players who rank highest on the combined tier list are the ones whose rolls, skills, supports, and blueprints reinforce each other, rather than fighting for the same token budget.
Stacking Order: Skills First, Rolls Second, Supports Third
A simple stacking order is to max the S and A tier skills first, because they affect every future session. Once Luck 1, Luck 2, More Support, and Gold Roll are online, the rolls you make from then on are worth more per token. The supports and blueprints you finish after that point land on a stronger base, which means each subsequent token spent has a higher expected return.
This stacking order is the single most underrated part of the Build and Kill Zombies value tier list. Players who chase Rare parts before maxing Luck 1 are paying full price for what they could have bought at a discount.
When to Stop Chasing a Layer
The value tier list also tells you when to stop. Once your S-tier slots are filled and your skills are banked, additional tokens spent on the same layer drop sharply in value. That is the moment to move to the next layer, not to keep rolling into the same machine hoping for a duplicate S-tier. The Build and Kill Zombies tier list explained mindset treats each layer as a phase, with a clear exit condition for moving on.
If you find yourself three sessions into chasing a single Legendary part, you are past the value line. Banking the tokens for a blueprint, a skill, or the next support slot will return more than a duplicate Legendary that does not change your build.
| Player Phase | Recommended Layer Focus | Exit Condition |
|---|---|---|
| Early game | Skills (Luck 1, More Support) | Both S skills maxed |
| Mid game | Rolls + Supports | S-tier slots filled |
| Late game | Blueprints + final skills | S-tier blueprint finished |
| Endgame | Min-max token spend | All layers at S or A |
Frequently Asked Questions
What is the Build and Kill Zombies value tier list based on?
The value tier list is based on three axes: impact on a single run, reusability across runs, and the opportunity cost of the tokens, cash, or Robux used to acquire the unlock. Rarity is used as a tiebreaker rather than a primary sort key, because a Common part with high grip can outperform a Legendary cosmetic shell in the first 30 waves.
How is the Build and Kill Zombies rarity tier list different from the value tier list?
The Build and Kill Zombies rarity tier list ranks items by their color tier and drop rate, while the value tier list scores them by what they actually return in a real run. Rarity tells you how rare a part is; value tells you whether that rarity is worth chasing on a tight token budget.
Which support should I prioritize first in the Build and Kill Zombies support tier list?
Prioritize the S-tier supports that change a weapon's behavior, such as damage engines and defensive anchors, because they let weaker weapons clear content they could not touch on their own. A-tier supports are the safe second pick, while B and F tier supports are best recycled once you have slots available.
Are skills or rolls more important in the Build and Kill Zombies skill tier list?
Skills are more important over the long run, because Luck 1, Luck 2, and More Support pay back their cost in fewer than ten runs and keep improving every future roll. Rolls matter most when your skills are already maxed, because a stronger roll is wasted if the luck multiplier is not online.
Is finishing a blueprint worth it in the Build and Kill Zombies blueprint tier list?
Finishing a blueprint is worth it only if the layout it unlocks adds a slot, a wheel setup, or a weapon mount that you cannot build by hand today. Reskin blueprints and duplicate-role blueprints sit at the bottom of the value tier list and are usually a worse use of tokens than a fresh round of rolls.