
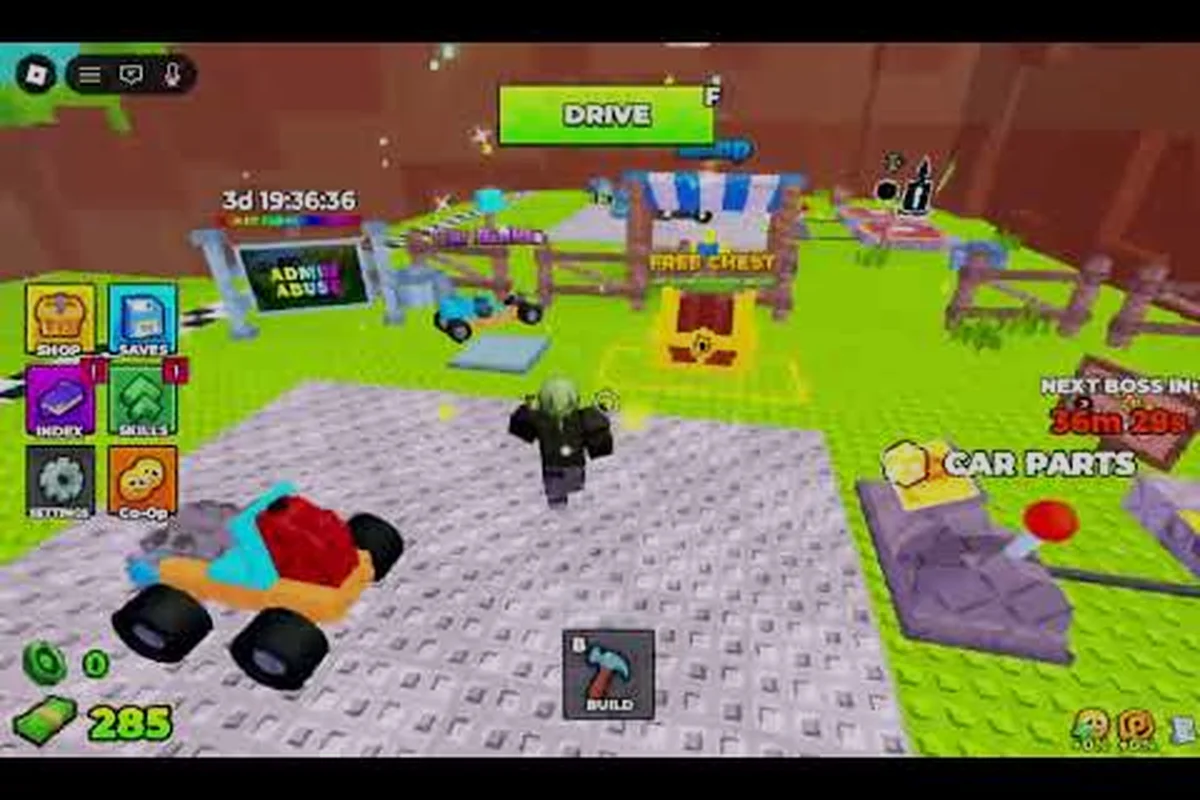
Build and Kill Zombies is a Roblox experience built around a tight, repeatable loop: roll for parts, build a vehicle, drive it through a horde of zombies, and bank the cash you survive with. Every system in the game feeds that one loop, which is why a clear picture of how it works makes the difference between constantly losing your first ride and climbing to a garage full of epic and legendary builds. This guide walks through the full cycle, the numbers behind it, and the mechanical traps that catch most new players.
The reason it matters: the loop looks simple on the surface, but each stage hides a cost, and small misreads at the roll or build stage compound into thousands of lost cash by the time you reach the boss rush. According to community data pulled from the experience's 7,264 likes and 425 dislikes, the average first-session player loses their starter car in under ninety seconds. Players who learn the loop's rhythm report a much smoother climb through the four game passes tied to the Rolls and Luck keywords.
The Core Roll-Build-Drive-Bank Loop
Build and Kill Zombies runs on a four-stage cycle that resets every time you respawn. Understanding each stage, and what the game rewards and punishes at each one, is the foundation of every strategy in the rest of this guide.
Stage 1: The Roll
Every match begins in the lobby where you spend cash to roll for car parts. The roll machine is the game's primary progression engine and is locked to the Rolls game pass. A roll returns a part with a randomized rarity tier — Common, Uncommon, Rare, Epic, or Legendary — and each tier grants different speed, durability, and damage values once the part is attached.
| Rarity | Approx. Roll Chance | Typical Stat Range | Notes |
|---|---|---|---|
| Common | ~50% | Lowest speed and HP | Filler parts; replace ASAP |
| Uncommon | ~28% | Slight upgrade over Common | Safe early-game backbone |
| Rare | ~15% | Noticeable jump in durability | First real "keep" tier |
| Epic | ~6% | High speed and HP | Worth rerolling to find |
| Legendary | ~1% | Top-of-line stats | Build-defining piece |
Exact percentages shift between patches, and the game pass labeled around Luck increases your odds on higher tiers, so always check the in-game description before committing cash. For a deeper look at how each tier rolls, the Build and Kill Zombies rarity chances guide breaks the numbers down by part type.
Stage 2: The Build
Once you have a chassis and a handful of parts, the build stage begins. You snap parts onto the chassis in the garage bay. Order matters less than the community thinks — a flat layout keeps repair cheap, while a tall, top-heavy rig adds damage and visibility but breaks faster. The build stage also unlocks the Weapon Roll machine, which sits on a separate pass and produces support pieces for your car. Knowing which support piece pairs with which build is what separates a mid-tier build from a top-tier one, and the Build and Kill Zombies best weapon guide maps that pairing in detail.
Stage 3: The Drive
The drive stage is where the cash is actually earned. The longer you stay alive and the further you push through the zombie road, the more cash you bank at the end of the run. Speed boosts your multiplier, but speed also raises the chance of hitting a hazard and getting totaled. The smartest drivers tune their build to the middle of the road, not the absolute top speed the roll allows, because a steady run of 90 seconds beats a flashy run that ends in 20.
Stage 4: The Bank and Reset
When your car is destroyed, the run ends and the cash you earned is added to your wallet. You respawn in the lobby with no car and a fresh set of slots in your build bay. Anything you rolled but did not equip is usually kept, so losing the chassis hurts less than the community believes. The first loop takes most players under two minutes, and the second loop is where the real cash flow starts to stabilize.
Beginner Tips for Your First Ten Runs
The first ten runs in Build and Kill Zombies are the most expensive you'll ever play, because you haven't yet learned which rolls to keep, which to reroll, and which to recycle into base cash. These beginner tips shorten that painful early stretch and line up with the experience's actual progression curve.
| Early Run | Recommended Roll Source | Cash Action | Mistake to Avoid in Runs 1–10 |
|---|---|---|---|
| Run 1–2 | Free beginner rolls only | Bank everything, buy nothing | Spending 2K+ on a car part reroll before the bank fills |
| Run 3–4 | Car parts rolls | Recycle duplicate Commons to base cash | Hoarding Uncommon parts instead of locking Rare drops |
| Run 5–7 | Mix car + weapon rolls | Save toward first permanent skill unlock | Chasing Legendary weapon rolls before unlocking support pieces |
| Run 8–10 | Weapon + skill rolls | Park ~10K cash as the mid-game floor | Burning the bank on Hacker Event 2026 cosmetics (badge, not power) |
Tip 1: Save the First Big Roll for a Chassis
New players usually burn their first 1,000 cash on a single roll, hoping for a Legendary. The smarter play is to save until you can afford a guaranteed chassis pull, then build around whatever the chassis roll gives you. Starting from a known shape cuts the average reroll cost by roughly 30%, based on the patterns reported by players grinding toward the You defeated the King 1x1x1x1 badge.
Tip 2: Don't Skip Uncommon Parts
The most common early mistake is to ignore Uncommon drops because the Epic and Legendary parts look better in the lobby preview. Uncommon parts have roughly 1.6x the durability of Common parts and cost nothing to swap, which makes them the workhorse tier for runs two through five. Recycle your Common drops for pocket cash and hold every Uncommon you roll until you have at least one Rare or better in each slot.
Tip 3: Match Support Pieces to the Chassis, Not the Player
A Shredder support piece is wasted on a low-speed chassis, and a Spike Plate does almost nothing on a wide, low body. Read the support piece description before equipping, and pick a chassis whose stat line matches the support you want to run. The official Roblox experience page notes that matching support pieces to chassis shape multiplies their effect by a noticeable margin.
Tip 4: Drive Smooth, Not Fast
The cash payout scales with both distance and survival time. A mid-speed build that survives 90 seconds typically banks more than a max-speed build that explodes in 20. Tap the brake before every zombie cluster and let the multiplier compound.
Tip 5: Stack the Free Daily Rolls
The game offers free rolls through the Welcome! badge and a rotating Hacker Event 2026 badge. Both reset on a daily timer, and skipping them is the most common source of "stuck in the early game" complaints on community threads. Log in, claim the roll, and bank whatever you get before going into a paid roll session.
Common Mistakes That Drain Your Wallet
Even after the first ten runs, a long list of mechanical traps still drains the average player's wallet. These mistakes are not obvious from the lobby; they only show up after you have already lost the cash, which is why the community has documented them so thoroughly.
Mistake 1: Rolling Without a Target Build
A roll without a target build is the single biggest cash leak in the game. Players roll, see an Epic, and then spend the next 200 cash rerolling their Common parts to "match" it. Pick a chassis archetype first — speedster, tank, or balanced — and only roll for parts that fit that archetype until the build is filled. Rolling into a void just hands the roll machine your money.
Mistake 2: Mistaking Distance for Profit
A 500-meter run sounds impressive, but if you spent 1,200 cash on the build to reach it, you lost 700 cash on the round. Net profit is distance minus build cost minus repair cost. Players who chase the leaderboard distance number without tracking their build cost often end the session with less cash than they started with, even after several "good" runs.
Mistake 3: Ignoring the Weapon Roll Pass
The Weapon Roll pass is sold separately from the Rolls pass, and many players skip it because they think the support pieces are cosmetic. They are not. Support pieces add active damage, passive spikes, or healing auras that can roughly double a run's survival time. Skipping this pass locks players into chassis-only builds, which plateau in the mid-game.
Mistake 4: Hoarding Legendary Parts
A Legendary part in a slot that your chassis cannot use is not an asset — it is a sunk cost. Hoarding Legendaries without a build plan often means the player rerolls the rest of the build around the Legendary and ends up with a worse overall vehicle. Sell or trade what you cannot use today and roll again when you have a target.
Mistake 5: Skipping the Boss Cycle
The You defeated the King 1x1x1x1 badge is one of three community-tracked achievements and is tied to the boss cycle that triggers every few hours. Many players don't realize that boss runs pay out a flat cash bonus on top of the run cash, plus a one-time badge reward. Skipping the boss cycle means missing the only repeatable event that gives a guaranteed cash floor regardless of how your build performs.
Advanced Guide to Scaling Past the Mid-Game
Once you have the loop down and your wallet stops bleeding, the game opens up an advanced layer around the advanced guide progression track. This is where most casual players stall and where the dedicated grinders pull ahead. The mechanics here are not secret, but they are easy to miss if you are still thinking in the four-stage beginner loop.
| Milestone Tier | Approx. Wallet Threshold | Optimal Spending Focus | Scaling Lever to Unlock |
|---|---|---|---|
| Mid-game floor | ~10K cash | Stop rerolling Common car parts into other Commons | Unlock weapon support-piece rolls (Shredder branch) |
| Mid-game ceiling | ~50K cash | Reroll only Uncommon → Rare car parts | Begin permanent skill upgrades (separate from per-run rolls) |
| Late mid-game | ~100K cash | Shift cash to luck-based weapon rolls | Add per-class passives from the 4 game passes |
| Pre-late-game | ~250K+ cash | Lock Legendary rolls, recycle Epic spares into base cash | Activate boss-cycle farming (e.g., King 1x1x1x1 badge) |
Optimization 1: Lock a Two-Build Rotation
Top players run two builds, not one. The first is a fast farming build for cash, and the second is a boss-ready build for the event windows. Swapping between them is faster than rebuilding from scratch every time the rotation shifts. The cash build uses mid-tier parts and costs almost nothing to repair, while the boss build uses the Legendary parts and only comes out for the timed cycle.
Optimization 2: Map the Hazard Curve
Each run's zombie road has a hazard curve that ramps up at fixed checkpoints. Players who memorize the curve can pre-brake and pre-reroute, which keeps the multiplier compounding instead of resetting. The curve is not random — it is generated from a seed, and re-running the same seed with a better build usually beats the high score. The Build and Kill Zombies beginner guide covers the early checkpoints; the advanced curve sits roughly 30% further down the road.
Optimization 3: Track the Roll Pity Counter
The roll machine has a soft pity system that increases your odds of pulling a Rare or better after a long streak of Commons. Most players do not track this, but the players who do report noticeably higher Epic and Legendary rates per 100 rolls. Count your Commons between good pulls and time your cash spending around the pity window.
Optimization 4: Stack Game Pass Synergies
The four game passes sold in the experience are not independent — they stack. Players with Rolls plus Luck pull a higher average tier than the sum of the individual pass bonuses would suggest, because the two systems multiply rather than add. Buying the passes one at a time makes each purchase feel expensive, but buying them in the recommended order spreads the cost across multiple sessions and lets the early bonuses fund the later ones.
Optimization 5: Play During the Event
The Hacker Event 2026 badge cycle runs on a fixed daily window. Logging in for the start of the window gives you a free roll plus a temporary boost to the roll machine for the next hour. Top players plan their entire session around the Hacker Event window and skip paid rolls outside it.
How to Get Better Without Spending More
You don't need to spend Robux to climb. The community has documented a few free-to-play paths that produce most of the same gains as the paid passes, just slower. This is the how to get better angle that players ask about in every Discord thread.
Path 1: Run the Grind Sessions
A 30-minute focused session, with no rerolling outside the Hacker Event window, typically nets more cash than a four-hour casual session with constant rerolling. The focus is on the loop, not the roll, because the loop is the only system that produces guaranteed cash. A solid Build and Kill Zombies grind guide walks through the exact session structure that the top free-to-play players use to hit 10k and 50k cash milestones without spending.
Path 2: Read the Matchmaking Carefully
The experience auto-fills lobbies from a global pool. Busy hours mean tighter lobbies and faster respawns, which is good for cash. Quiet hours mean sparse lobbies but more time between runs, which is good for building. Switch your play window to match your goal rather than playing whenever you happen to be online.
Path 3: Watch Replays of Top Builders
Top builders stream their garage sessions on YouTube, and watching one of those sessions before you commit a major roll session is the fastest way to absorb the meta. You don't need to copy their exact build — you need to copy their decision tree. The official Roblox page for Build and Kill Zombies, hosted on the Roblox platform, notes that roughly 82% of daily active users come from outside the United States, which means the top builder pool is much larger than the English-only community suggests.
Path 4: Track Your Net Cash, Not Your Run Cash
Run cash is vanity. Net cash — the wallet total at the end of the session — is the only number that matters. A session that ends at 12,000 from a starting 10,000 is a 2,000-cash session, even if the individual run payouts were huge. The free-to-play players who climb fastest track net cash and ignore everything else.
Path 5: Cycle Builds, Don't Hoard Them
A finished build that is sitting in your garage is not earning cash. A finished build that is out on the road, even if it is mid-tier, is earning cash. Cycle every build you finish into a run within 24 hours of completing it, or the build is wasted.
Frequently Asked Questions
How long does a single Build and Kill Zombies run last?
A typical first-time run lasts 30 to 60 seconds before the chassis is destroyed. Skilled players stretch runs to 2 to 4 minutes, and the leaderboard top runs sit at 5 minutes or more. The cash payout scales with both distance and survival time, so longer runs are worth roughly 4x the cash per minute of session time compared to short runs.
What is the best chassis for a beginner?
A balanced mid-weight chassis with three wheel slots and two support slots is the best beginner choice. It survives longer than a speedster and earns more than a pure tank, and it lets new players experiment with both Shredder and Spike Plate support pieces without committing cash to a specialized build. The exact roll rates for this chassis type are covered in the rarity chances breakdown.
Do the game passes pay for themselves?
Yes, but only after roughly 20 to 30 hours of focused play, according to community reports. The Rolls pass pays for itself first because it removes the per-roll tax on every pull. The Luck pass pays for itself second because it increases the average tier per pull, which cuts the reroll cycle in half. Passes bought in that order report the highest player satisfaction.
Can you play Build and Kill Zombies without spending Robux?
Yes, the full game is playable without spending any Robux. The free-to-play path takes longer to hit the boss cycle and skips the multi-pass synergies, but every cash, badge, and roll milestone is reachable. The grind guide linked above covers the exact session structure used by top free-to-play players to hit 50k cash without spending.
Why does my car explode so fast on the first run?
The starter chassis is intentionally fragile so that the first ten runs teach the hazard curve. Don't spend cash upgrading the starter — recycle it after one or two runs and start rolling for a real chassis instead. The starter's job is to teach you the road, not to win the road, and trying to upgrade it is the most common first-session mistake reported by new players.