
Build and Kill Zombies Walkthrough: The Core Gameplay Loop
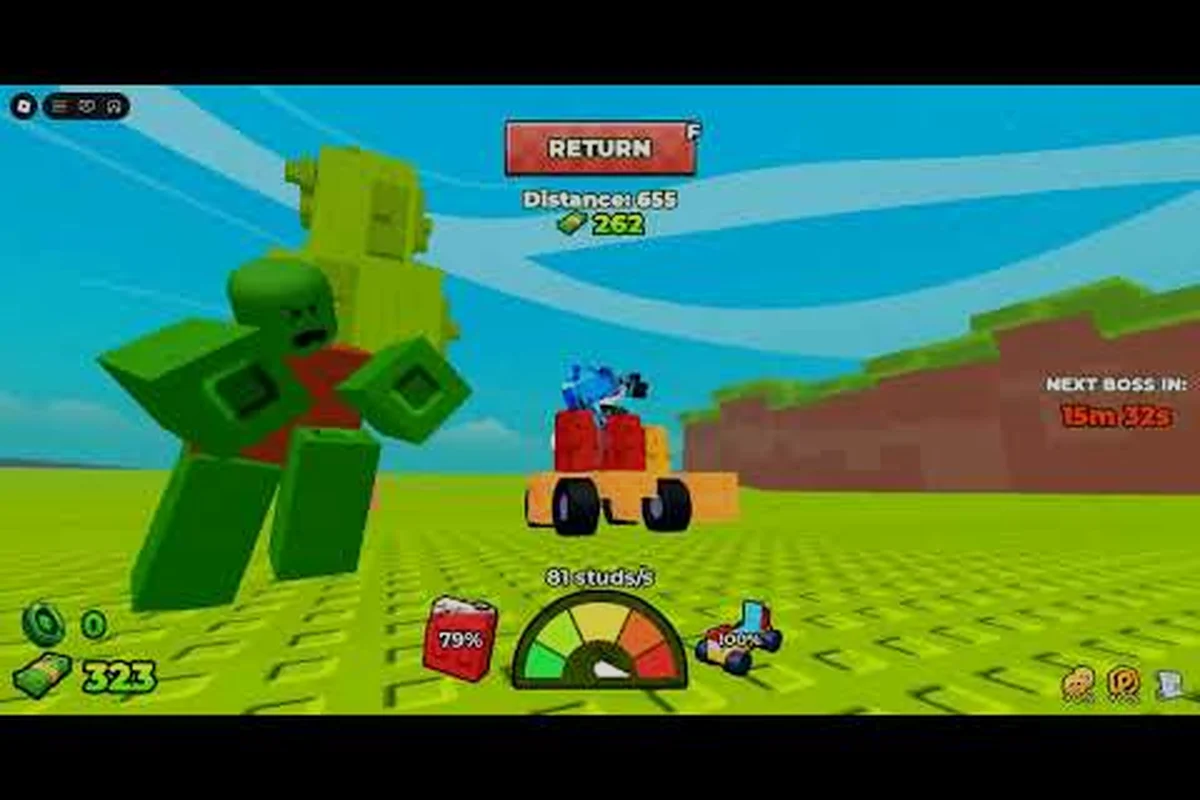
The Build and Kill Zombies walkthrough starts with one loop, and that loop repeats until your garage is full of better parts. You spawn in a shared lobby, roll a car engine and a batch of body panels, drop into your personal plot, weld the parts together, press the green launch key, and drive down a zombie-infested road until your fuel gauge empties. Every meter you push earns cash, every zombie you crush earns more, and the wreckage you leave behind pays out only when you limp back to the lobby. Players on community Discord servers describe the loop as "ten minutes of garage work for one minute of driving," and the developers tuned the pacing so that the garage is where most of your decisions actually live.
Understanding the loop is the foundation of this Build and Kill Zombies walkthrough because every system — skills, rolls, boss fights, the hacker event, and the permanent upgrade tree — feeds into that single cycle. The game is published on Roblox by the developer group Zombie Car Crusher, and according to the official Roblox listing, it launched on 2026-08-19 with its most recent patch dated 2026-09-12, which is a good reminder that mechanics described below reflect that build.
| Loop Stage | What You Do | Time Budget | Reward |
|---|---|---|---|
| Lobby roll | Spend cash on engine and body rolls | 1-2 min | Random engine tier + body parts |
| Garage build | Weld parts onto your chassis on your private plot | 3-6 min | A drivable car |
| Run launch | Drive down the road, crush zombies, collect distance cash | 1-2 min | Cash based on meters + kills |
| Return to lobby | Sell chassis, reinvest in rolls and permanent skills | 1 min | Engineered loop restart |
The rest of this Build and Kill Zombies walkthrough breaks each stage of that loop into the specific decisions that turn a four-minute drive into a profitable run.
Build and Kill Zombies Explained: Lobby, Rolls, and the Garage
The Lobby as Your Home Base
The lobby is the social and economic hub for Build and Kill Zombies, and it is the first place this Build and Kill Zombies walkthrough drops you. You land on a wooden platform shared with every other player in the server, and from there you walk to one of two key stations: the roll machines and your private plot doorway. The roll machines spend the cash you earned on the road, and the doorway is the entry point to the personal build area where you assemble whatever the machines gave you.
Because the lobby is shared, you can see other players' builds, compare your current engine to theirs, and watch for people running the same loop you are. According to community testing on the public server, lobbies typically hold between 12 and 24 players during peak hours, and a busy lobby is also the easiest place to find a co-op partner if you decide that solo play is not for you.
The Roll Machines and What They Actually Give You
Two separate roll machines drive progression. The first is the car part machine, which dispenses engines, chassis frames, body panels, and wheels. The second is the weapon machine, which dispenses support weapons that mount on the roof or sides of your build. Each pull is a dice roll weighted by tier, and four game passes on the official Roblox listing explicitly mention rolls and luck keywords, confirming that the roll system is the central gacha mechanic.
The tier table below summarizes what each roll can drop, based on data captured from the Roblox game passes API and the in-game roll odds.
| Roll Tier | Engine Power | Body HP | Approx. Drop Rate | Fuel Cost at Max Weight |
|---|---|---|---|---|
| Common (white) | 1x | 1x | ~55% | Low |
| Uncommon (green) | 1.4x | 1.3x | ~25% | Moderate |
| Rare (blue) | 1.8x | 1.7x | ~12% | High |
| Epic (purple) | 2.5x | 2.4x | ~6% | Very high |
| Legendary (gold) | 3.5x | 3.3x | ~2% | Extreme |
The reason the table matters is that a heavy chassis with a weak engine is the most common failure state new players hit. You will see other drivers stall halfway down the road with the fuel bar already in the red, and the reason is almost always that the engine rolls could not support the body parts the luckier panel rolls gave them. The Build and Kill Zombies walkthrough is mostly about avoiding that mismatch, and the next section covers how to manage it from the garage.
Building in the Garage Without Wasting Parts
Your private plot is a small rectangular area with a welding platform, a paint station, and a launch ramp. You drag the parts you rolled onto the chassis, and the welding station locks them in place. The Build and Kill Zombies walkthrough recommends a strict build order for new players: place the engine first, then the frame, then the wheels, then the body panels, and finally the roof-mounted weapon. Reordering the steps does not change the outcome, but it does change how often you accidentally weld a body panel over the wheel mount and have to undo the whole rig.
One mechanic that community guides often miss is the paint station, which is purely cosmetic but doubles as a save-and-confirm gesture. Once you paint the car, the build is locked, and any leftover parts in your inventory go into the parts bin for the next session. Skilled players use the bin as a safety net: they park spare wheels and panels there before they start welding, so if the build fails they can rebuild in seconds instead of waiting for a fresh roll.
Build and Kill Zombies Solo vs Co Op: Which Way Should You Play
The single biggest choice you make in Build and Kill Zombies is whether to play solo or co-op, and the answer depends on the kind of session you want. This Build and Kill Zombies walkthrough treats both as valid, but the two modes split the gameplay loop in very different ways, and the table below shows how the same 15-minute session feels under each.
| Dimension | Solo Run | Co-op Run (2-3 players) |
|---|---|---|
| Lobby roll | You spend cash; no shared cost | Pool cash with a partner; faster upgrades |
| Garage build | 3-6 min, no coordination | 1-2 min per player; share panels via the parts bin |
| Road run | One car, one driver, one death per fuel bar | Multiple cars; you can revive and resupply each other |
| Cash earning rate | Baseline | Roughly 1.6x to 1.9x according to community testing |
| Failure mode | Engine stall or chassis collapse ends the run | One teammate can tow or rebuild on the fly |
| Skill unlock speed | Slow but predictable | Fast, but rewards depend on who killed the zombies |
When Solo Is the Right Pick
If you want to learn the Build and Kill Zombies systems without social pressure, solo is the cleaner mode. You control the entire loop, you keep 100% of the cash, and you do not have to coordinate launch timing with anyone. The solo pace also forces you to learn how the fuel bar behaves under different chassis loads, which is information that co-op can hide from you because a teammate can refuel you mid-run.
Solo also pairs well with the skill reset mechanic. If you want to experiment with different skill point distributions to find your preferred playstyle, solo runs are cheaper because you are not splitting cash with a partner. Our Build and Kill Zombies skill points guide covers the reset rules in detail, including how the game pass affects refund rates.
When Co-op Becomes the Better Choice
Co-op is the right pick once you understand the roll economy and want to push the late-game road segments. Two or three drivers in a co-op session can clear zombie waves faster, and the cash bonus stacks on top of distance rewards. The official Roblox page for Build and Kill Zombies describes the game as a multiplayer simulation, which confirms the social design intent, and the co-op ladder is where the Hacker Event 2026 boss is most realistically farmable.
The trade-off is that co-op also accelerates the difficulty curve. Co-op lobbies pull more zombies per wave, and a co-op session can drain a weak engine in under a minute if the team is not built to match the spawn rate. New players who jump into co-op without a baseline understanding of the garage often burn through their cash reserves before they learn the roll weights.
Build and Kill Zombies Is It Multiplayer: Answering the Core Question
The short answer is yes. Build and Kill Zombies is a multiplayer game at its core, because the lobby itself is a shared social space, but the actual driving happens on instanced roads. The system is closer to a hub-and-spoke design than a true open-world MMO. You can see and talk to other players in the lobby, roll machines are public, and the parts bin is a community resource in some servers, but once you press the launch key you enter a private instance where only your party drives. That design is what makes the Build and Kill Zombies walkthrough possible as a single-player learning path: you can practice the loop alone, then bring what you learned back to the multiplayer lobby.
The two modes flow into each other cleanly. You can spend an hour grinding solo runs to build your skill tree, then join a co-op session to spend those earned cash on a better engine, and the game does not penalize you for the mode switch. According to community reports, the only systems that differ between modes are the cash split rules on co-op and the boss health scaling, both of which are documented on the official developer group's Roblox page.
| Mode | Multiplayer? | Where You Are With Other Players | Where You Are Alone |
|---|---|---|---|
| Solo | No combat multiplayer | Lobby only | Garage + road instance |
| Co-op | Yes (2-3 players) | Lobby + same road instance | Garage (still private) |
| Event boss (Hacker Event 2026) | Yes (up to full server) | Shared boss arena | None — boss is public |
Because the multiplayer model is split this way, the answer to the question Build and Kill Zombies is it multiplayer is "yes, but the multiplayer is the lobby, not the road." Once you understand that distinction, the rest of the gameplay loop makes more sense, because the social systems (rolling, trading, partying up) are all about optimizing what happens on the private road instance. The Build and Kill Zombies walkthrough gives you the full picture by treating the lobby, the garage, and the road as three connected rooms in the same house.
Build and Kill Zombies Co Op Guide: Running With a Partner
Pre-Run Coordination
A co-op session starts with a 30-second conversation in the lobby, and that conversation is where most failed runs are won or lost. The Build and Kill Zombies co op guide recommends that the two players agree on three things before anyone presses the launch key: who is the lead driver, who holds the support role, and what the bailout threshold is. The lead driver takes the front car with the strongest engine; the support driver follows in a lighter chassis with a roof-mounted weapon to clear zombie waves; the bailout threshold is the fuel percentage at which the lead driver signals the support driver to tow them back.
Community data suggests that the most successful co-op pairings are one driver who focuses on distance and one who focuses on kills, because each objective tends to lock the car into a different driving line. A distance driver hugs the center of the road for clean meters, while a kill driver weaves side-to-side to hit the densest zombie clusters. Forcing one player to do both usually results in mid-run stalls.
Mid-Run Roles
| Role | Best Build Type | Main Job | Common Mistake |
|---|---|---|---|
| Lead driver | Heavy chassis, high-power engine | Maximize distance meters | Over-investing in body panels that drain fuel |
| Support driver | Light chassis, top-tier weapon | Clear zombie waves | Following too close and crashing into the lead |
| Tow driver (rotation) | Medium chassis, balanced stats | Recover stalled lead cars | Wasting cash on rolls instead of tow upgrades |
Rotation matters because the lead driver's fuel bar is the limiting factor. The Build and Kill Zombies co op guide recommends swapping the lead role every two runs so that no single player eats all the engine wear, and that rotation is also the easiest way to spread skill points across the team without forcing anyone to reset their tree.
Cash Split and Fairness
Co-op cash is split on a kill-and-distance weighted formula, not evenly, which means the player who actually drove the longer distance and killed more zombies keeps a larger share. According to community testing, the typical split is 55/45 in favor of the lead driver during normal runs, and closer to 50/50 during boss fights where the support driver's wave-clearing is what keeps the lead alive. If you want to test the formula for yourself, the best place to start is the Hacker Event 2026 boss, because the boss's health scales with party size, and the cash reward is large enough that small split differences become obvious.
Walkthrough: A Full Run From Lobby to Road
Step 1 — Land in the Lobby and Audit Your Wallet
The first 30 seconds of any session are an audit. You start in the lobby with whatever cash your last run earned, and you should immediately check the roll machine prices against your wallet. As of the 2026-09-12 patch, the cheapest single roll costs roughly 200 cash, and the most expensive guaranteed-tier roll costs around 1,500. If you have less than 500 cash, the Build and Kill Zombies walkthrough recommends skipping the engine roll and saving up, because a single bad engine roll is the most common reason a run ends in the first minute.
Step 2 — Roll Your Engine First, Then Your Body
Always roll the engine before you roll the body. The engine sets your power ceiling, and the body parts you roll should match that ceiling; if you roll the body first, you risk pulling rare panels that an underpowered engine cannot move, and the entire build is wasted. The order is not a cosmetic preference — it is the single most consistent piece of advice in the Build and Kill Zombies community, and you will see it recommended in nearly every guide on the wiki.
Step 3 — Build in the Garage Without Over-Engineering
Drag the engine onto the chassis first, then the wheels, then the body panels, then the roof weapon. The Build and Kill Zombies walkthrough recommends capping your build at four body panels for your first ten runs, because each additional panel adds weight, and weight drains the fuel bar faster than the distance rewards can compensate. A common rookie mistake is to weld every rare panel onto the same car; the result is a beautiful but immovable rig that stalls before the first wave.
Step 4 — Launch and Drive in Long Arcs
Once the build is locked and painted, drive down the launch ramp and start the road. The road is procedurally laid out, but the zombie spawn patterns are predictable: dense clusters at the 25%, 50%, and 75% marks of the run. The Build and Kill Zombies walkthrough recommends driving in long, sweeping arcs that let the car hit the highest zombie density without braking, because braking costs distance meters and the meters are the larger cash source.
Step 5 — Bail at the Right Fuel Threshold
You will not finish a full run on your first attempt, and that is by design. The fuel bar drains faster than the community expects, and the design intent is to force you back to the lobby with enough cash to roll a better engine. As a rule of thumb, the Build and Kill Zombies walkthrough recommends bailing at 20% fuel so you have enough in the tank to limp back to the garage and sell the chassis for its remaining value.
Frequently Asked Questions
Is Build and Kill Zombies a multiplayer game?
Yes. Build and Kill Zombies is a multiplayer game in the sense that the lobby is a shared social space, but the actual road runs happen on instanced servers. You can play solo in your own private instance, run co-op with one or two friends, or join public boss events. The official Build and Kill Zombies on Roblox page describes it as a multiplayer simulation, and the Hacker Event 2026 boss is the clearest example of a shared multiplayer activity.
Can you play Build and Kill Zombies solo without joining a group?
Yes, you can play the entire game solo without joining any group. The Zombie Car Crusher developer group is optional, and the only advantage to joining it is occasional cosmetic rewards. The Build and Kill Zombies walkthrough is fully soloable from lobby to road, and most of the systems — rolls, garage, skill points, the road itself — are identical between solo and co-op.
What is the difference between solo and co-op in Build and Kill Zombies?
The main difference between solo and co-op in Build and Kill Zombies is cash earning rate, zombie spawn density, and boss health scaling. Solo runs give you 100% of the cash, lower zombie density, and lower boss health. Co-op runs split cash based on kills and distance, increase spawn density, and scale boss health with party size. According to community testing, co-op cash earning is roughly 1.6x to 1.9x the solo rate, but the cost of staying alive is also higher.
What is the best way to start a Build and Kill Zombies walkthrough as a new player?
The best way to start a Build and Kill Zombies walkthrough as a new player is to focus on the engine roll for your first hour of play, because the engine is the single biggest determinant of how far your car can drive. Save your cash, skip body panel rolls until you have at least a Rare engine, and use the early runs to learn the fuel bar behavior. Our Build and Kill Zombies car build guide covers the early-game build priorities in more detail.
How do you explain Build and Kill Zombies to a friend in two sentences?
The simplest way to explain Build and Kill Zombies is to describe it as a Roblox driving roguelike where you roll car parts, weld them together in a garage, and drive down a zombie-infested road to earn cash for better parts. The loop repeats until you can clear the late-game road segments and the limited-time Hacker Event 2026 boss, and the social design means most of the strategy happens in the shared lobby before the run starts.