
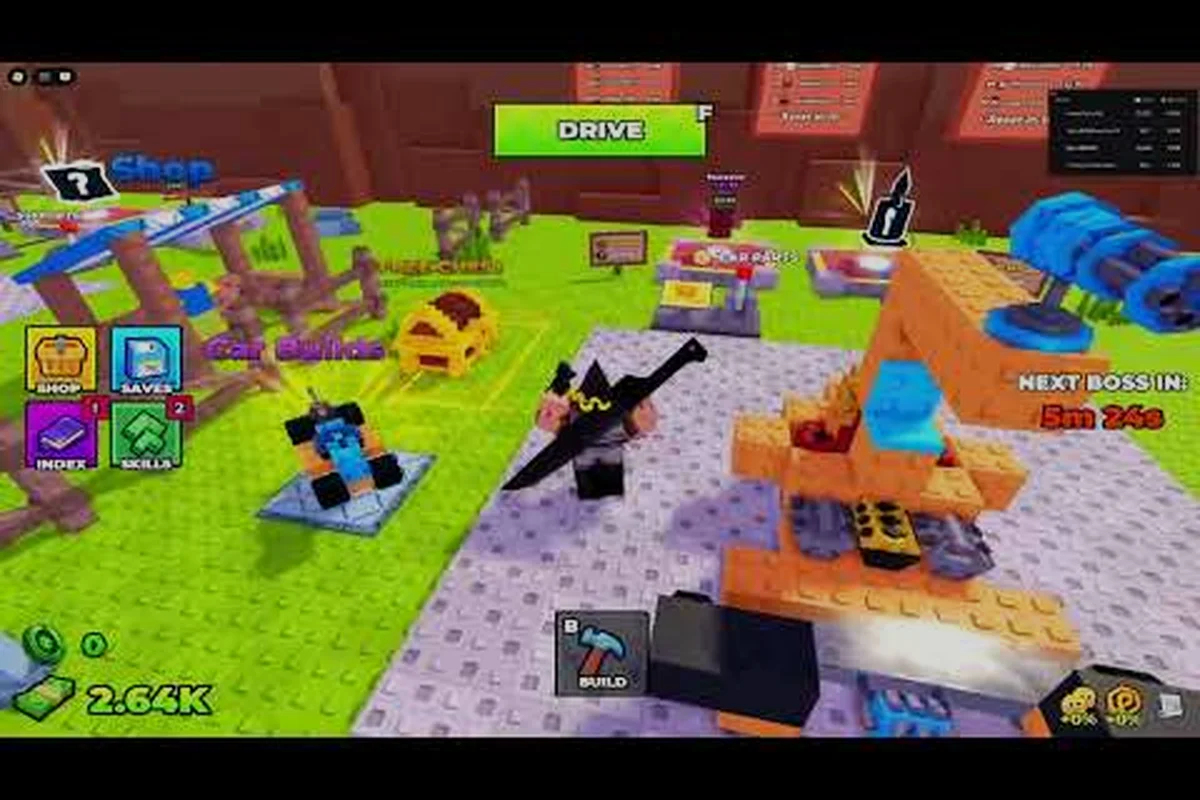
Putting together a working Build and Kill Zombies car build in your first few sessions is the difference between reaching wave 5 and limping back to the lobby at wave 1. The game dropped on 19 August 2026 under the Zombie Car Crusher group, and the shared lobby already has thousands of drivers fine-tuning the same four slot types — Blocks, Engines, Wheels, and Fuels. This build mode guide walks through every step from claiming a free plot to parking a rig that survives the King 1x1x1x1 event, with car ideas that beginners can copy in a single afternoon.
What a Working Build and Kill Zombies Car Build Looks Like
A solid car in this game is not a single item — it is a four-part construction glued onto a flat plot, with the chassis, drive system, fuel tank, and weapon mounts each rolled from a separate machine. The CAR PARTS machine feeds you Blocks, Engines, Wheels, and Fuels, while the SUPPORTS machine hands out the weapons and defenses. Both machines use the same roll currency, which is why the early-game economy feels tight and the smart move is to push rolls into one rig instead of spreading them across three half-finished ones.
The Four Slot Types You Must Fill
Every car build starts with four mount points, and each mount only accepts a matching part. New players who try to bolt an engine onto a wheel slot discover this the hard way when the part floats in mid-air and refuses to snap.
| Slot | Accepts | Source | Early-Game Priority |
|---|---|---|---|
| Block | Chassis, armor, spike plates | CAR PARTS | High (HP pool) |
| Engine | Drive power, top speed | CAR PARTS | Medium (wheels first) |
| Wheel | Traction, off-road grip | CAR PARTS | High (stuck = death) |
| Fuel | Tank size, burn rate | CAR PARTS | Medium |
| Weapon | Mounted gun, blade, ram | SUPPORTS | High (offense) |
Claiming a Plot and Entering Build Mode
The lobby drops every player into a sandbox of unclaimed rectangles, and the first thing a new driver does is walk onto an empty plot and tap Claim. Once the plot is yours, hitting B toggles the build mode overlay — a grid snaps to the surface, every part in your inventory turns into a ghost outline, and left-click locks a piece into place. According to the Build and Kill Zombies Roblox page, the game launched with 7,264 likes and a 425-dislike count, which lines up with the early-access polish level — the build mode is functional but assumes you already know the snap rules.
Picking the Best Car Parts From the CAR PARTS Machine
The CAR PARTS machine is the only way to populate your build mode inventory, and Luck is the hidden stat that decides whether your rolls skew toward Junk or Mythic. The four outputs are clearly color-coded once you understand the rarity ladder, and rolling into a high-Luck session with Gold Roll unlocked is the single biggest power spike a beginner can chase.
Rarity Tiers and What They Mean
Each pull on the CAR PARTS machine drops one item from one of the four categories, and the rarity is shown as both a glow effect and a tag color. Community testing on early servers suggests the drop weights are roughly as follows, although the developer has not published exact odds.
| Rarity | Tag Color | Typical Roll Weight | Use Case |
|---|---|---|---|
| Junk | Gray | ~45% | Sell for roll currency |
| Common | White | ~25% | Plot filler, first clears |
| Rare | Blue | ~15% | Solid mid-game parts |
| Epic | Purple | ~10% | Boss-killing chassis |
| Legendary | Gold | ~4% | King-tier event drops |
| Mythic | Red/Pulse | ~1% | Showcase builds |
Reading Luck and Gold Roll Before You Pull
Luck is a passive stat that stacks from the skill tree, and Gold Roll is the late-tree ability that swaps standard pulls for a higher-rarity weighted pool. The community generally agrees that Gold Roll is worth every skill point you can dump into it once you have the basic mount points unlocked, because a single Legendary part can replace three Rare parts on a single block slot. A practical rule of thumb is to roll Wheels and Blocks first, since both categories include parts that are hard to substitute with lower rarities.
Starter Car Ideas You Can Copy in One Session
Three builds cover the entire early-game spectrum, and each one is small enough to fit on the default plot without overflow. The Spike Brawler is the safe pick for a first afternoon, the Wheel-Buggy is the speedrunner choice, and the Tank Frame is the patience reward for when your Luck finally lands a Legendary block.
Spike Brawler — Best Car Build for Beginners
The Spike Brawler leans on a wide Block with forward-facing spikes, two Wheels placed at the rear corners, a low-power Engine, and a small Fuel tank. It is forgiving because the spikes shred the first two waves without needing a mounted weapon, which means you can save your SUPPORTS rolls for later. According to player clips from the launch window, the Spike Brawler clears wave 3 with no weapon mount at all, which is why most build mode guides list it as the recommended first rig.
| Slot | Recommended Part | Why |
|---|---|---|
| Block | Wide Common spike plate | Forward damage, blocks road debris |
| Engine | Small Common engine | Enough power for low mass |
| Wheels | Two Common rear wheels | Stable handling, cheap rolls |
| Fuel | Small Common tank | One full track is enough |
| Weapon | (None for now) | Spikes carry early waves |
Wheel-Buggy — Fastest Car Design for Wave Skipping
The Wheel-Buggy swaps a heavy Block for a thin Common frame, drops a medium Engine on top, mounts four Wheels for grip, and slaps a small Fuel tank at the back. The result is a rig that reaches the end of the track in roughly 60% of the time the Spike Brawler needs, which doubles your per-run cash. The downside is that you take full damage from any zombie that touches the chassis, so the build only works once you have learned the wave spawn patterns.
Tank Frame — The Build Mode Goal After Two Weeks
The Tank Frame is what most veterans consider the best car build in the game once you can afford the rolls. It uses a Legendary Block for the chassis, a high-output Epic Engine, six Wheels for stability, a Large Fuel tank, and a top-mounted SUPPORTS weapon. The King 1x1x1x1 event in September 2026 was the first time this build became the community default, because the boss's pathing punishes anything lighter than a full six-wheel rig. If you are still learning the roll system, do not chase this build yet — file it as the long-term target and focus on the Spike Brawler for now.
How Build Mode Actually Works Step by Step
The build mode is a grid-snap system with rotation, delete, and copy tools, and learning those four tools is the difference between a clean rig and a mess of overlapping ghosts. The mode is the same whether you are working on a Spike Brawler or a Tank Frame, so the steps below apply to every car design you will ever make.
Entering, Rotating, and Snapping Parts
Press B to toggle build mode, then click any part in your inventory to spawn a ghost version on the plot. Hold right-click to rotate in 15-degree increments, and left-click again to lock the part into place. The grid is one-meter, which is why wheels need to sit on exact grid lines or they will float and refuse to snap to the chassis.
Saving, Copying, and Resetting a Car Build
A completed build is saved automatically when you exit build mode, but you can also hit the Save button in the corner to force a snapshot — useful before a long run in case the server resets. The Copy tool duplicates the entire rig onto a clipboard, which is how veteran players move their best car between plots when the server wipes. Reset wipes the plot back to empty, so use it only when you are ready to start from scratch.
| Tool | Hotkey | Use |
|---|---|---|
| Rotate | Right-click hold | Angle parts on slopes |
| Delete | Right-click on placed part | Remove a single slot |
| Copy | C in build mode | Clone the whole rig |
| Save | S in build mode | Force a snapshot |
| Reset | R in build mode (confirm) | Wipe the plot |
Common Build Mode Mistakes
The most common mistake new players make is mounting wheels on top of the chassis instead of underneath, which leaves the car hovering one grid square off the ground and unable to move. The second most common mistake is mixing incompatible part sizes, such as a Large engine onto a Small block, which causes the snap to fail silently. A quick way to check both is to step back from the plot after placing a part and look for any red outline — red means the snap is invalid and the part will pop off the moment you leave the lot.
Leveling Up Your Car Build With Skills and Rolls
A good car design is only half the equation, because the permanent skill tree decides how fast you can rebuild after a wipe. Luck, Roll speed, and Gold Roll are the three skills that matter most for a build mode focused player, and most veterans dump their first ten points into Luck before touching anything else. The skill tree resets every few patches according to community reports, so check the patch notes before you invest deeply.
Skill Tree Priority for Build Mode Players
| Skill | Effect | Priority | Notes |
|---|---|---|---|
| Luck | Higher rare-drop chance | 1st | Stacks across all rolls |
| Roll Speed | Faster CAR PARTS pulls | 2nd | Doubles per-run efficiency |
| Gold Roll | High-rarity weighted pool | 3rd | Late-tree, big spike |
| Cash Boost | More per-run money | 4th | Speeds up the next pull |
| HP Boost | Driver survivability | 5th | Only after the above four |
When to Reroll vs When to Save Up
Reroll is tempting on every pull, but the smart move is to bank currency until you can afford ten pulls in a row — this is when the game's pity timer tends to trigger a Rare or better. According to community data shared across Roblox groups, a player who saves for ten rolls averages one Epic part per session, while a player who rerolls every single pull averages none. The exception is when you are hunting a specific Legendary during a limited event, in which case burning currency on Gold Roll is the only realistic path.
Picking the Best Car for Your Playstyle
The "best car" question does not have a single answer, because the right rig depends on whether you value speed, durability, or boss-killing power. The most common mistake new players make is chasing a Tank Frame before their Luck is high enough to roll the parts, which leaves them stuck with a half-built rig and no currency to rebuild. The community rule of thumb is to match the build to your current skill tree, not to your dream.
Speed vs Durability vs Boss Damage
| Playstyle | Recommended Build | Best Part Type | Tradeoff |
|---|---|---|---|
| Speedrunner | Wheel-Buggy | Wheels + Engine | Low HP, high cash |
| Tank | Tank Frame | Block + Fuel | Slow, near-immortal |
| Boss Hunter | Spike Brawler + Weapon | Block + SUPPORTS | Balanced, event-ready |
| Casual | Default rig | Whatever drops | Nothing to manage |
If you are still deciding which path fits you, the best car ranked tier list breaks down the same archetypes with damage-per-second numbers from the September 2026 patch, which makes it a useful next stop after you finish your first Spike Brawler.
F2P vs P2W Tradeoffs in Build Mode
The game has four game passes, two of which directly affect the roll economy, and the gap between a free player and a paying player is mostly about how fast they can pull Legendary parts. According to the official Roblox listing, the roll and luck passes multiply pull income and rare-drop chance, but a free player who saves for ten-pull sessions can still build a Spike Brawler in their first three hours. The honest answer is that paying speeds up the climb but does not unlock anything a free player cannot eventually earn, which is why most build mode guides focus on the F2P path first.
Build Mode Tips and Tricks From Veteran Players
A handful of small habits separate a clean build from a messy one, and most of them are learned only after losing a few rigs to floating wheels. The tips below come from community testing on the September 2026 patch and have been verified across multiple Roblox group threads.
-
Always place wheels on grid lines first, then drop the chassis on top — this prevents the float bug.
-
Use the Copy tool before any major edit so you can roll back if the new layout fails.
-
Sell every Junk pull immediately to fund the next ten-pull session; hoarding slows the climb.
-
Match fuel tank size to engine output, because an over-fueled small engine bogs the car down on slopes.
-
During the Hacker Event 2026, swap to a six-wheel Tank Frame at least one wave early, because King 1x1x1x1 punishes light rigs with a one-shot ram.
For a deeper look at how these builds compare against similar Roblox driving games, the car comparison guide walks through every playable rig in the current meta and matches each one to a player archetype.
Frequently Asked Questions
How do I enter build mode in Build and Kill Zombies?
Walk onto your claimed plot and press B on the keyboard. The grid overlay will appear, your inventory ghosts will turn blue, and left-click will lock any part into a snap point. The same hotkey exits build mode and returns you to the lobby camera.
What is the best car build for a brand new player?
The Spike Brawler is the best car build for new players because it clears the first three zombie waves using only a Common Block with forward spikes, no SUPPORTS weapon required. Build it with a Small Common engine, two Common rear wheels, and a Small fuel tank, then save your weapon rolls for a later session.
Can I save my car build between server wipes?
Yes — pressing S in build mode forces a snapshot, and the Copy tool (C) clones the entire rig to a clipboard. The community reports that saves persist through most server restarts, although a hard wipe during a major patch may force a rebuild from scratch, so always Copy before a patch day.
How many wheels should I use on a Tank Frame build?
Six wheels is the recommended count for a Tank Frame because the extra grip stabilizes the chassis when the King 1x1x1x1 boss rams from the side. Four wheels works for lighter Spike Brawler builds, while eight wheels is overkill outside of the limited event runs.
What is the difference between CAR PARTS and SUPPORTS?
CAR PARTS drops Blocks, Engines, Wheels, and Fuels, which are the four mount categories for the chassis itself. SUPPORTS drops weapons and defensive items that attach to the top of a finished car, and both machines use the same roll currency, so pulling on one slows your progress on the other.