
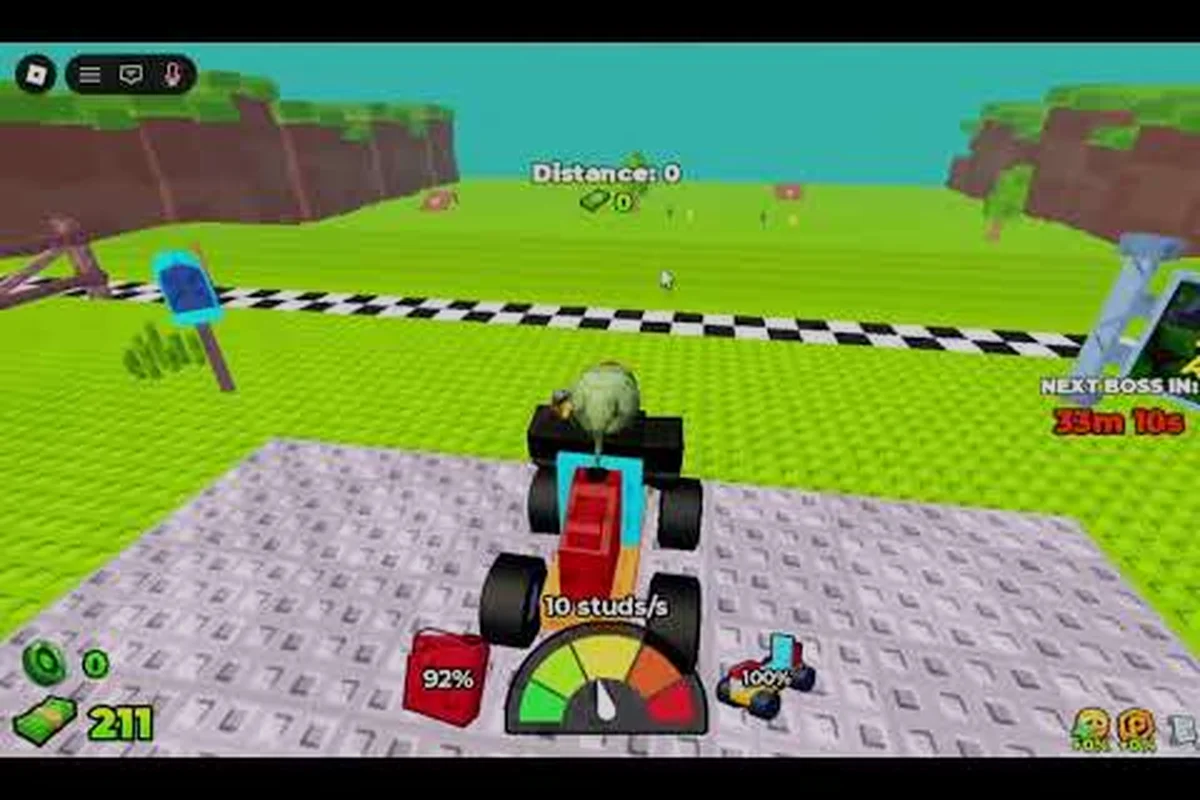
Picking the right combination of parts in Build and Kill Zombies decides whether your car crumbles at the first zombie cluster or clears the entire wave. The four BLOCKS / ENGINES / WHEELS / FUELS categories that drop from the CAR PARTS roll machine each define a different part of that survival equation, and learning how they stack against each other is the fastest way to push distance, cash, and Boss Event rewards further. This guide breaks down every block slot from chassis to fuel so you can stop rerolling randomly and start mounting parts that actually extend your run.
How the Build and Kill Zombies Best Blocks System Works
The build loop in Build and Kill Zombies is deceptively simple on the surface. You press B to enter Build Mode, drop parts onto your plot, hit the green launch key, and drive forward while zombies pour onto the road. Underneath that loop sits a layered progression system that the official Build and Kill Zombies gameplay trailer walks through visually: every block, engine, wheel, and fuel tank is pulled from a different roll machine, each part carries its own stat profile, and the way you stack them decides how far your car actually goes.
According to the in-game About description, Build and Kill Zombies launched on Roblox under the Zombie Car Crusher group on 2026-08-19, with the most recent patch landing on 2026-09-12. As of that update, there are four part families in the CAR PARTS machine, all categorized under the BLOCKS / ENGINES / WHEELS / FUELS umbrella. BLOCKS covers the chassis, armor, and spike plates that form your car's body. ENGINES determines acceleration, top speed, and the torque you need to push through zombie walls. WHEELS controls grip, drift, and how well the car handles rough terrain. FUELS dictates how long the engine keeps running before you grind to a halt mid-horde. The four families are independent, so a great engine on a bad chassis still loses parts, and the best wheels in the game cannot save a fuel tank that empties in thirty seconds.
The full build process follows a clean six-step rhythm:
-
Enter the lobby and approach the CAR PARTS machine to roll a new batch of parts.
-
Read the rarity of each drop; higher-rarity parts dominate the same slot.
-
Enter Build Mode by pressing B and slot the part into its matching category.
-
Mount supporting parts (BLOCKS first, then ENGINES, WHEELS, FUELS) so each layer reinforces the next.
-
Test the build on a short drive to confirm stability and fuel range.
-
Return to the lobby before the boss timer ends to repair and roll again.
| Block Family | Primary Role | Stat Influenced Most | Common Mistake |
|---|---|---|---|
| BLOCKS | Chassis, armor, spikes | HP and contact damage | Rolling armor without checking weight |
| ENGINES | Powertrain | Top speed and torque | Stacking engines instead of fixing wheels |
| WHEELS | Traction and handling | Grip, drift, terrain roll | Using off-road tires on paved lanes |
| FUELS | Range | Drive duration | Ignoring fuel type matchup with engine tier |
A key reason the build system feels so deep is that each family has its own rarity curve. A low-rarity chassis cannot match the durability of a high-rarity one even if every other part is top tier, which is why veteran players always reroll the chassis slot first. The best way to approach a new session is to lock in your highest-rarity chassis, then build the rest of the car around that anchor so you do not waste rolls on parts you will swap out.
Build and Kill Zombies Best Chassis for Each Rarity Tier
The chassis is the spine of your entire build, and most of the Build and Kill Zombies best chassis decisions come down to weight class versus durability. A heavier chassis survives longer but burns through fuel faster and drags down acceleration, while a light chassis gives you speed but breaks after a few boss waves. The chassis slot in Build and Kill Zombies is the foundation of your build, and choosing well here means every part you stack later actually contributes. Players who skip straight to engines or wheels often find their runs cut short because the body of the car gives out long before the powertrain does.
| Chassis Class | Weight Tier | Durability | Best Paired With | Reroll Priority |
|---|---|---|---|---|
| Light Frame | Low | Low | High-speed engine, off-road wheels | High only for speed runs |
| Standard Block | Medium | Medium | Balanced engine, road wheels | Default mid-game pick |
| Reinforced Chassis | High | High | Heavy engine, spiked armor | High for boss farming |
| Armored Hauler | Very High | Very High | Torque engine, large fuel tank | Top priority for late game |
Light Frame Chassis
The Light Frame is the speed-focused chassis, and it shines when you are chasing distance records on flat lanes. Its low weight means even a mid-rarity engine can push it past most zombie clusters, but the low durability means a single Boss Event smash can total it. Pair it with a high-rarity engine and off-road wheels if you want to squeeze extra meters out of every run, but do not invest in heavy armor or large fuel tanks because the weight cancels the speed advantage.
Standard Block Chassis
The Standard Block sits in the sweet spot for most players. It carries enough durability to survive early boss waves, and its medium weight keeps fuel consumption reasonable. This is the chassis that the community treats as the default workhorse, and the wider Build and Kill Zombies chassis lineup is documented in detail on the comprehensive chassis and engine reference. If you are still building out your part collection, the Standard Block is almost always the safer reroll target over a Light Frame, because one bad boss hit on a Light Frame ends the run while the Standard Block usually survives a partial repair.
Reinforced and Armored Chassis
The Reinforced and Armored tiers are the late-game anchors. They cost more fuel and sacrifice top speed, but they shrug off Boss Event contact damage that would shred a Standard Block. According to community data, players who push into the 1x1x1x1 King encounter almost always run a Reinforced or Armored chassis because the boss's shockwave hits hard enough to one-shot lighter frames. The trade-off is that you need a heavy engine and a large fuel tank to keep the build moving, which means more rolls across the ENGINES and FUELS machines.
Build and Kill Zombies Best Engine Combos
Engines turn a static block of metal into a car that actually moves, and the Build and Kill Zombies best engine choice depends almost entirely on the chassis you have already locked in. A heavy engine on a light chassis will spin the wheels uselessly, while a light engine on an armored chassis will leave you crawling in the third zombie wave. Picking the right engine slot in Build and Kill Zombies comes down to matching the torque curve to the chassis weight class and the fuel tank capacity, which is why most players reroll engine and fuel in the same session.
| Engine Tier | Torque Class | Top Speed Class | Best Chassis Match | Fuel Draw |
|---|---|---|---|---|
| Compact Engine | Low | Medium | Light Frame | Low |
| Sport Engine | Medium | High | Standard Block | Medium |
| Heavy Engine | High | Medium | Reinforced Chassis | High |
| Industrial Engine | Very High | Low | Armored Hauler | Very High |
Compact and Sport Engines
Compact and Sport engines are the speed-build core. They give up raw torque for higher top speed, which is what you want on a Light Frame or Standard Block when your goal is to outrun zombie swarms rather than smash through them. The Sport Engine is the most popular engine in the game according to player reports because it pairs well with the Standard Block chassis and keeps fuel draw within a reasonable range. If you are still learning the lane layouts, a Sport Engine on a Standard Block is the most forgiving mid-tier combo in the game.
Heavy and Industrial Engines
Heavy and Industrial engines are the boss-farm core. They generate the torque needed to push a Reinforced or Armored chassis through dense zombie walls without losing momentum, but they drink fuel at a brutal rate. Players who run Heavy or Industrial engines almost always pair them with the largest fuel tank they can roll and reroll the WHEELS slot for high-grip tires to prevent the extra power from spinning them out. The build and kill zombies best engine decision at this tier is really a fuel-management decision, because no amount of torque helps if your tank empties halfway through the boss arena.
A useful rule of thumb is to treat the engine as a multiplier on every other part. A Heavy Engine on a Standard Block without reinforced wheels will not deliver the torque, because the wheels slip before the engine can transfer the power. A Compact Engine on an Armored Hauler is similarly wasted because the chassis weight overwhelms the engine output. Match the engine tier to the chassis tier first, then worry about fuel draw.
Build and Kill Zombies Best Wheels and Tire Choices
Wheels are the most underestimated part family in Build and Kill Zombies, and the Build and Kill Zombies best wheels choice can change a build from a constant slide-fest into a stable, repeatable runner. Wheels control grip, drift, and how well your car handles the broken pavement and zombie debris that litters the lane. Most players reroll the wheel slot last, but community testing shows that a high-rarity wheel on a mid-rarity chassis can outperform a high-rarity chassis on low-rarity wheels in most handling scenarios.
| Wheel Type | Terrain Strength | Grip Rating | Drift Behavior | Best Chassis Match |
|---|---|---|---|---|
| Road Wheels | Paved lanes | High | Low drift | Standard Block |
| Off-Road Wheels | Broken pavement | Medium | Medium drift | Light Frame |
| Spiked Wheels | Zombie-dense lanes | High | Low drift | Reinforced Chassis |
| Heavy Tread Wheels | Mixed terrain | Very High | Very low drift | Armored Hauler |
Road Wheels and Off-Road Wheels
Road wheels are the default pick because most of the early-game lanes are paved. They give you high grip and almost no drift, which means predictable handling when a zombie jumps into your lane. Off-road wheels are the alternative for stages with broken pavement and debris fields, and they trade some grip for much better stability over rough terrain. Players who swap between lanes often carry both sets and rotate based on the run, but for a single-build approach the road wheels win on pure consistency.
Spiked and Heavy Tread Wheels
Spiked wheels add a small contact-damage bonus on top of normal grip, which makes them the preferred wheel for boss-farming builds that want every bit of extra damage. Heavy tread wheels are the late-game answer to mixed terrain, and their very high grip means even an Armored Hauler chassis handles predictably. According to community testing, the best wheels tier list in Build and Kill Zombies almost always places Heavy Tread at the top because they handle every lane type without forcing a swap. If you are rerolling wheels, prioritize Heavy Tread first, Spiked second, then Road and Off-Road depending on the lane.
A common mistake is running low-rarity wheels on a high-torque engine. The engine pushes harder than the tires can grip, the car spins out, and the run ends in a ditch. If you have a Heavy or Industrial engine, do not roll for wheels below Spiked rarity unless you have no other option.
Build and Kill Zombies Best Fuel and Fuel Type Matchups
Fuel is the part family that decides how long your run actually lasts, and the Build and Kill Zombies best fuel choice is really a question of engine draw versus tank capacity. A small fuel tank on a Heavy Engine empties before the second boss wave, while an oversized fuel tank on a Compact Engine is wasted inventory you could have spent on armor. The Build and Kill Zombies fuel types system splits tanks into size tiers and blend types, and each engine class has a natural matchup that experienced players use to plan their rerolls. If you want a more detailed breakdown of how fuel interacts with the rest of the build, the wider car tier list at the Build and Kill Zombies car tier list hub maps out part-by-part synergies that go beyond the fuel slot alone.
| Fuel Type | Tank Size | Burn Rate | Best Engine Match | Range Tier |
|---|---|---|---|---|
| Standard Fuel | Small | Low | Compact Engine | Short |
| High-Grade Fuel | Medium | Medium | Sport Engine | Medium |
| Turbo Fuel | Large | High | Heavy Engine | Long |
| Experimental Fuel | Very Large | Very High | Industrial Engine | Very Long |
Standard and High-Grade Fuel
Standard fuel is the starter tank and pairs naturally with the Compact Engine. It is cheap to roll, light to carry, and gives you enough range for early-game boss encounters. High-Grade fuel is the mid-tier option and is the most common tank in player builds because it matches the popular Sport Engine on a Standard Block chassis. If you are running a speed build, the High-Grade tank covers the distance without dragging down your acceleration.
Turbo and Experimental Fuel
Turbo and Experimental fuel tanks are the late-game options for Heavy and Industrial engines. They are heavy, they eat inventory space, and they are the only tanks that keep an Industrial engine running through a full boss arena. Community data suggests that players who push into the 1x1x1x1 King encounter almost always run Experimental fuel because anything smaller empties before the boss's final phase. The build and kill zombies best fuel decision at this tier is essentially a commitment to a Heavy or Industrial engine build, because smaller tanks cannot keep up with the draw.
Build and Kill Zombies How to Get More Fuel
Players who want to extend their runs without rerolling constantly usually ask the same question: build and kill zombies how to get more fuel without burning rolls. There are three reliable paths.
-
Roll the FUELS machine more often because every additional pull is a chance at a higher-tier tank. Luck boosts from the skill tree raise the rarity floor.
-
Cash in on distance rewards because longer drives unlock bonus fuel tanks from the reward track, and these are usually higher tier than the average roll.
-
Trade duplicate parts in the lobby for fuel canisters, which add a partial tank to your current loadout without rerolling.
The most consistent path is the roll machine, because every part family shares the same Luck multiplier. If you have saved up skill points in the Luck branch, push them before a heavy reroll session and you will pull higher-rarity fuel tanks more often. Players who ignore Luck end up rerolling the FUELS slot five or six times before they see a Turbo or Experimental tank, which wastes cash that could have gone into a better engine or chassis.
Putting the Best Blocks Together: Recommended Loadouts
The four families only matter when you stack them, so a good build is a chain of mutually reinforcing parts rather than four best-in-slot picks. The Build and Kill Zombies best blocks loadout that most players converge on falls into three archetypes: Speed Runner, Balanced Build, and Boss Farmer. Each archetype has a different priority order for which slot you should reroll first.
| Archetype | Chassis | Engine | Wheels | Fuel | Reroll Order |
|---|---|---|---|---|---|
| Speed Runner | Light Frame | Sport Engine | Road Wheels | High-Grade Fuel | Engine → Wheels → Fuel |
| Balanced Build | Standard Block | Sport Engine | Road Wheels | High-Grade Fuel | Chassis → Engine → Fuel |
| Boss Farmer | Reinforced Chassis | Heavy Engine | Spiked Wheels | Turbo Fuel | Chassis → Fuel → Wheels |
Speed Runner Loadout
The Speed Runner focuses on distance and cash per run. The Light Frame chassis keeps the car light, the Sport Engine pushes top speed, and Road Wheels give the grip needed to handle paved lanes without drifting into zombie clusters. High-Grade fuel gives enough range for most boss encounters without weighing the car down. The reroll priority is the engine first because a Compact Engine on this chassis leaves you unable to clear zombie walls, then wheels, then fuel.
Balanced Build Loadout
The Balanced Build is the default for most players. The Standard Block chassis carries a Sport Engine comfortably, Road Wheels give stable handling, and High-Grade fuel covers the mid-game distance range. Reroll the chassis first because a Standard Block anchors every other part, then the engine, then fuel. This loadout also scales into late game if you swap the chassis to a Reinforced Chassis and the fuel to Turbo Fuel, which is why most veterans keep one of each in their inventory.
Boss Farmer Loadout
The Boss Farmer is built around the 1x1x1x1 King encounter and the Hacker Event 2026. The Reinforced Chassis absorbs boss shockwaves, the Heavy Engine pushes through zombie walls, Spiked Wheels add contact damage to every run, and Turbo Fuel covers the longer boss arena. Reroll the chassis first because a Reinforced Chassis is the hardest part to pull, then fuel, then wheels. Most players who run this build also stack armor BLOCKS on top of the chassis for extra durability, which is the one place where rolling more BLOCKS actually pays off.
Frequently Asked Questions
What are the Build and Kill Zombies best blocks for a beginner?
The Standard Block chassis, Sport Engine, Road Wheels, and High-Grade Fuel form the most forgiving beginner build because every part is mid-rarity, easy to roll, and works on every lane type. You can clear the first boss encounter with this loadout and still have cash left to reroll one slot after the run.
Which Build and Kill Zombies best chassis should I reroll first?
The chassis slot is the highest-priority reroll because every other part stacks on top of it. A Reinforced or Armored chassis is the most valuable pull, but a Standard Block is the most reliable fallback if your luck stat is low. Lock the chassis in before you burn rolls on engines or wheels.
What is the best engine in Build and Kill Zombies for boss fights?
The Heavy Engine on a Reinforced Chassis is the strongest boss-fight combo because the torque pushes through zombie walls and the chassis absorbs the shockwave damage. Pair it with Turbo Fuel to keep the engine running through the full boss arena.
How do Build and Kill Zombies fuel types affect my range?
Fuel types control both tank size and burn rate. Standard and High-Grade fuel cover short to medium range for Compact and Sport engines, while Turbo and Experimental fuel cover long range for Heavy and Industrial engines. Matching the fuel type to the engine class is what decides whether your run ends at the second boss wave or the final phase.
Can I swap parts between runs in Build and Kill Zombies?
Yes. Build Mode is accessible from the lobby at any time, and parts move with your plot rather than your car, so you can swap chassis, engines, wheels, and fuel between runs. Most players keep two or three complete loadouts on the same plot so they can switch from a Speed Runner build to a Boss Farmer build without rerolling.