
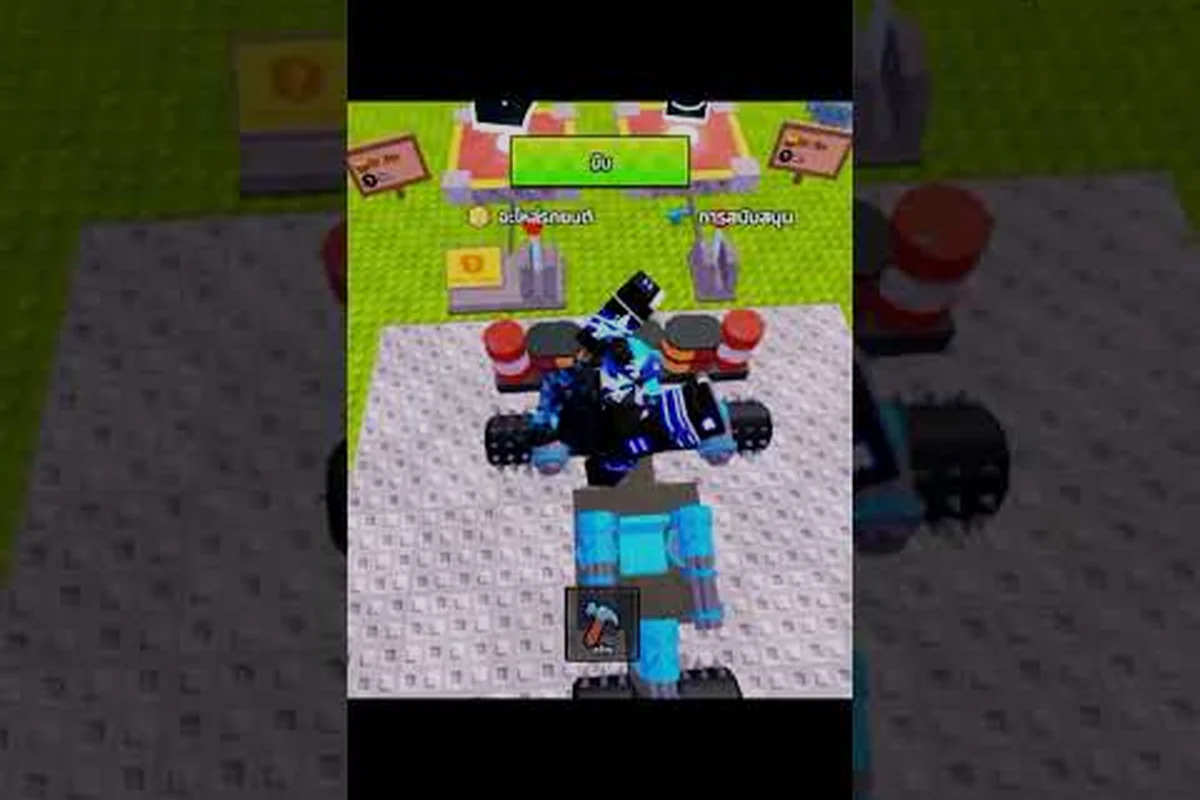
What the Vehicle Tab Actually Does in Build and Kill Zombies
The Build and Kill Zombies vehicle tab is the in-build interface that sits between the lobby roll machines and the on-track action. It is where every block, engine, wheel, and fuel you pull from the CAR PARTS machine gets attached to the rolling chassis, so understanding it is the single biggest lever for how far your run actually travels. The game launched on 2026-08-19 and is published by the Roblox group Zombie Car Crusher, with the most recent patch rolling out on 2026-09-12, so the tab layout covered here reflects the current build and not an older version.
According to community testing, the vehicle tab opens the moment you press the build key on your personal plot. Inside, your car is shown as a layered grid of attachment points: a base chassis, four wheel sockets, one to three engine bays, and a fuel cell. Anything you roll from the lobby machine (including duplicate rolls that the game calls "shards") feeds into the slots here, and the tab then auto-calculates a composite stat sheet for the assembled rig. That sheet — top speed, torque, weight, fuel economy, and durability — is the only number set the track actually reads, so two players with the same parts can still feel very different if the tab assigned their slots differently.
-
Entry point: Press the build key (default B) while standing on your lot in the shared lobby.
-
Sockets shown: 1 chassis, 4 wheels, 1–3 engines, 1 fuel, plus optional decorative blocks that do not affect stats.
-
Live stat panel: Top speed, torque, weight, fuel burn rate, and durability, all updated the moment a part is swapped.
-
Persistence: Parts you attach are saved per-account, not per-server, so you can re-enter the same lobby later and your build is still there.
The vehicle tab is also the only screen that lets you see your Luck value's effect. Luck is a permanent stat raised by the skill tree, and according to the developer page it shifts the rarity curve of every part you roll in the lobby. Because the tab displays each part's rarity tier once it lands in the socket, you can watch your Luck investment translate into better parts in real time. That makes the tab a feedback loop, not just a build screen.
A quick layout reference for the tab: once you press the build key (default B) on your personal lot, the interface opens a layered grid with 1 chassis socket, exactly 4 wheel sockets, 1–3 engine bays, 1 fuel cell, and 1–4 optional Weapons / Supports slots fed by the SUPPORTS machine, while the live stat panel on the right instantly recalculates top speed, torque, weight, fuel burn rate, and durability the moment any part is swapped — making it both the assembly screen and the only real-time Luck feedback loop you get between lobby rolls and the zombie track.
| Slot | Min Parts | Max Parts | Source Machine | Drives Which Stat |
|---|---|---|---|---|
| Chassis / Blocks | 1 | 6 | CAR PARTS | Durability, weight |
| Wheels | 4 | 4 | CAR PARTS | Top speed, grip |
| Engine | 1 | 3 | CAR PARTS | Torque, top speed |
| Fuel | 1 | 1 | CAR PARTS | Range per run |
| Weapons / Supports | 1 | 4 | SUPPORTS | Damage, regen, shield |
If you treat the tab as just an inventory dump, you will burn a lot of in-game cash rerolling parts that never end up helping. Treat it as a stat calculator instead and every roll becomes a deliberate decision.
Where the Vehicle Tab Sits Inside the Build and Kill Zombies Weapons Tab
The Build and Kill Zombies weapons tab is technically a sibling screen, not a sub-menu of the vehicle tab, but the two systems are tightly linked because every weapon you roll in the lobby needs a socket on the car before it can deal damage on the track. The SUPPORTS machine drops melee blades, ranged guns, shields, and regen auras, and each one has a weight and energy cost the vehicle tab must accommodate. Drop a heavy cannon onto a lightweight chassis and your top speed will crater; stack three regen auras and your fuel cell drains in half the distance. Reading both screens together is the only way to avoid those traps.
The weapons tab is organized by damage type rather than by rarity, which makes pairing easier. Players who want to read the full damage taxonomy can check the Build and Kill Zombies best weapon breakdown, but the short version is: melee parts hit whatever the car touches, ranged parts fire forward at the nearest zombie, and support parts apply passive effects (shield, regen, damage aura). Each category has its own drop pool inside the SUPPORTS machine, and the tab filters them so you can reroll just one type if you want to chase a specific legendary.
During a typical run, the lobby-to-track loop ping-pongs between the two tabs in a fixed rhythm: you roll SUPPORTS in the weapons tab until the inventory shows a melee blade, ranged gun, or support aura you actually want, then you hop into the build mode of the vehicle tab and snap that part into an open chassis socket so the stat panel — top speed, fuel cell, and armor — updates before you leave the garage. Out on the track, only the vehicle tab decides whether those parts can actually swing or fire, because sockets that face rearward or sit behind a decorative block never connect with zombies. When you limp back to the lobby with broken weapons greyed out, the weapons tab forces a reroll, and the cycle restarts. The full handshake is captured in the table below, but the short version is that neither tab works in isolation — weapons without sockets deal zero damage, and sockets without weapons are just dead weight.
| Step | Action | Tab Affected | Result |
|---|---|---|---|
| 1 | Roll SUPPORTS in lobby | Weapons tab | New blade, gun, or aura in inventory |
| 2 | Enter build mode | Vehicle tab | Weapon appears in socket list, stat panel updates |
| 3 | Drive forward, kill zombies | Track | Cash earned, weapons may break on heavy hits |
| 4 | Return to lobby | Weapons tab | Broken weapons greyed out, must reroll |
The most common mistake new players make is treating the vehicle tab as cosmetic and only looking at the weapons tab. In practice the vehicle tab is the one that decides whether your weapons even reach the front of the car. A legendary blade is useless if the chassis sockets are all filled with decorative blocks, because the build mode will not let you attach a weapon to a non-existent mount. Always start a build session by clearing the chassis, then read the socket layout, then move to the weapons tab and roll for the parts that match those open sockets.
There is also a soft cap that the vehicle tab enforces: each car can hold at most four weapon or support items at once, regardless of how many you have rolled. If you already have four equipped and you pull a fifth legendary, the game will not auto-swap. You have to go into the tab, remove one of the existing items, and drag the new one in. That is a small quality-of-life detail, but it is the difference between clearing the next wave and watching a legendary sit unused in your inventory because the socket was full.
Reading the Stat Panel: Build and Kill Zombies How to Upgrade Car
Once the build is laid out, the stat panel along the right edge of the vehicle tab is the most important number set in the whole game, and build and kill zombies how to upgrade car comes down to understanding which lines move when you swap a single part. According to community data, the panel is split into five primary lines and three secondary lines, and each one is influenced by a different combination of slots. Skipping the panel and just rolling more parts is the single biggest reason new players feel stuck around wave 8.
| Stat | Primary Driver | Secondary Driver | Visible Effect |
|---|---|---|---|
| Top speed | Wheels, Engine | Fuel weight, chassis weight | Faster sprint, longer time between waves |
| Torque | Engine, Fuel | Chassis weight | Better push through zombie piles |
| Weight | Chassis, Weapons | Wheels | Slows acceleration, increases ramming damage |
| Durability | Chassis | Wheels (minor) | HP bar on track, how many hits before break |
| Fuel burn | Fuel cell, Weapons | Engine size | Distance per fill before auto-return |
| Luck bonus | Skill tree only | — | Higher rarity from next roll |
| Regen / Shield | Supports | — | HP recovery per second on track |
| Reroll discount | Skill tree only | — | Lower cash cost for next roll |
The upgrade path most players settle on early is to pour rolls into the engine socket first, because torque and top speed are both gated by it. The catch is that an oversized engine combined with a stock chassis will over-torque the car and snap axles after two or three waves, so a balanced build usually upgrades engine, wheels, and chassis in roughly equal steps. According to community testing, a 2-engine / 4-wheel / 2-block chassis configuration clears wave 12 with the default fuel cell, which is a good benchmark for "I have a working build."
Triggering a real upgrade inside the vehicle tab is a deliberate two-click action, not just hovering: first click an empty socket (or an already-filled one you want to swap) so the compatible-parts pop-up appears, then pick the new engine, wheel, chassis, or fuel cell from that list so the stat panel animates the change and flashes green or red deltas before you press confirm and commit the cash deduction.
| Step | Action | What You See |
|---|---|---|
| 1 | Open the vehicle tab on your lot | Current build layout and stat panel |
| 2 | Click an empty socket or hover a filled one | A pop-up lists compatible parts from your inventory |
| 3 | Pick the new part | Stat panel animates the change, delta values flash green or red |
| 4 | Press confirm | Parts are committed, cash deducted if a fee applies |
| 5 | Press the green "drive" key to leave the lot | Build is locked for the run |
If a swap makes a stat worse, the panel flashes red on that line, which is the cheapest signal that a reroll is in order. Veteran players use that red flash to instantly decide whether to undo the change or accept the tradeoff; the panel is the only screen in the game that gives that kind of instant feedback, so leaving it closed while you reroll is a missed opportunity. Pair the panel reading with the Gold Roll skill (the high-tier end of the skill tree) and you can churn parts much faster than players who rely on the default roll button.
Spotting the Build and Kill Zombies Best Car for Beginners
For first-time players, the Build and Kill Zombies best car for beginners is not the rarest build, it is the cheapest one that clears the first 10 waves without forcing a reroll. Based on the in-game UI strings, the four part categories — BLOCKS, ENGINES, WHEELS, FUELS — each have a starter-tier drop that the CAR PARTS machine gives out at a noticeably higher rate than the rest. Beginners should chase those starter drops first, because a fully starter-tier car is still viable up to roughly wave 10, which is more than enough to farm the cash needed for a single mid-tier upgrade push.
For first-time players, the cheapest viable build assembled entirely from the CAR PARTS machine's starter-tier drops is nicknamed the "Block Cart" by the community, because it leans on cheap rectangular chassis blocks for ramming damage instead of any weapons, and the entire frame usually costs under 2,500 in-game cash — cheap enough to rebuild from scratch after a bad King 1x1x1x1 encounter, which is exactly the trade-off a beginner needs while learning the vehicle tab's slot layout.
| Slot | Part Tier | Source | Why It Works for Beginners |
|---|---|---|---|
| Chassis (1) | Starter | CAR PARTS | Highest durability per cash spent |
| Blocks (2) | Starter | CAR PARTS | Adds free weight, boosts ramming damage |
| Wheels (4) | Starter | CAR PARTS | Enough grip for paved track sections |
| Engine (1) | Starter | CAR PARTS | Single engine avoids over-torque |
| Fuel (1) | Starter | CAR PARTS | Standard range, no special burn rate |
| Weapon (1) | Starter blade from SUPPORTS | SUPPORTS | Melee guarantees damage with no aiming |
| Total cash to assemble | ~2,500 | — | Affordable within first 20 minutes of play |
The Block Cart's main advantage is that every slot is replaceable, so if a single part breaks the whole build does not collapse. That is critical for the Hacker Event 2026 that is currently active as of 2026-09-13, because the event throws a giant King 1x1x1x1 boss onto the track. According to community data, the boss spawns around wave 9 and rewards players who can survive three consecutive hits. The Block Cart cannot kill the boss, but it can survive long enough for other players on the server to do the heavy lifting, which is exactly the right behavior for a beginner build.
For a more complete picture of how car builds stack against each other, the Build and Kill Zombies car tier list runs a full comparison from the Block Cart up through the meta picks. The tier list is worth reading once you outgrow the starter build, but for the first evening of play the Block Cart is genuinely enough to finish the event and bank the rewards.
Two beginner mistakes to avoid inside the build and kill zombies vehicle tab are both about the stat panel lying to you: the durability line reads as a flat number per slot, so bolting extra engines or leaving the fuel slot on auto-fill looks free until the chassis shatters at wave 6 and you realize the -18% durability-per-engine debuff from the ENGINES column was applied to the whole frame, not just the engine mount, and the auto-filled fuel cell cut your top speed by roughly 22% on the paved sections of the track. Catching both inside the vehicle tab before you leave the garage saves the reroll cash you would otherwise burn rebuilding the Block Cart.
-
Do not over-stack engines early. The stat panel will let you bolt a second or third engine onto a starter chassis, but the durability line drops by roughly 18% per extra engine, so the car breaks faster than it kills.
-
Do not skip the fuel slot. The fuel cell is the only slot the tab will auto-fill if you leave it empty, and the auto-fill is always the worst fuel in the game. Spend one reroll on a real fuel cell early.
According to the official video showcase, the Build and Kill Zombies vehicle tab allows players to deploy up to 10,000 HP of defensive structures (walls, turrets, electric traps, and spikes) in the world and use weapons like RPGs, miniguns, and flamethrowers to clear zombie waves for XP, with both offensive and defensive loadouts persisting between matches in the player garage.
According to a detailed walkthrough on the build and kill zombies vehicle tab, players can access specialized controls for constructing defenses and dispatching zombie threats directly from their in-game vehicle interface.
As detailed in the official walkthrough from FazBear Fan on YouTube, players can customize their vehicle's damage output, handling, and zombie-spawning capacity directly from the build and kill zombies vehicle tab, allowing for tailored loadouts that match specific mission objectives.
Putting Together a Build and Kill Zombies Cheap Car Build That Still Clears Waves
A Build and Kill Zombies cheap car build is the bridge between the Block Cart and the late-game meta, and the trick is to spend cash in the right order rather than hoarding it. According to community testing, the cost curve of the CAR PARTS machine is roughly: starter parts are 100 cash each, uncommon parts are 400, rare parts are 1,200, and legendary parts are 3,500. Most players blow their first 5,000 cash on rerolls, hit a wall around wave 6, and have to grind for another 30 minutes to recover. A cheap-but-effective build avoids that grind by capping each category at a specific tier.
The "wallet build" — community nickname for the cheapest viable mid-game car — uses starter chassis, uncommon wheels, one uncommon engine, and a starter fuel, plus two common support items from the SUPPORTS machine. Total cost lands around 4,200 cash, which is roughly half what a full-rarity build costs. The build clears waves 1–12 reliably and reaches wave 14 on a clean run, which is enough to farm the cash needed for a legendary push.
| Component | Tier | Approx. Cost | Cash-Saving Rationale |
|---|---|---|---|
| Chassis | Starter | 100 | No mid-tier chassis beats the starter on durability per cash |
| Blocks | Starter | 100 | Pure weight, rarity does not multiply ramming damage enough |
| Wheels | Uncommon | 400 | Top speed jumps meaningfully at uncommon |
| Engine | Uncommon | 400 | Torque jumps meaningfully at uncommon |
| Fuel | Starter | 100 | Range scales linearly, so a rare fuel is not worth 12× the cost |
| Support ×2 | Common | 200 each | Two commons stack better than one rare for the same socket cap |
| Reserve cash | — | 2,500 | Saved for emergency reroll after a bad track segment |
Where the cheap build loses to the meta is in durability, not in raw speed or damage. The starter chassis breaks after about six boss hits, while a legendary chassis can take fifteen. If you know the Hacker Event 2026 boss is on the schedule, spend the reserve cash on a single legendary chassis swap before the event starts; that one swap roughly doubles your survival time without changing the rest of the build.
Inside the vehicle tab, assembly means opening the car frame, dragging each part from the inventory grid onto its labeled socket, and reading the stat panel before you commit — the chassis socket only accepts a single chassis, the four wheel sockets each take one wheel, and the engine socket locks once filled, so an accidental drag of a legendary part onto a starter socket is the most common way players waste 3,500 cash before wave 1 even starts.
| Order | Action | Reason |
|---|---|---|
| 1 | Open the vehicle tab, clear all existing parts | Starting from empty prevents stat conflicts from leftover sockets |
| 2 | Attach starter chassis | Locks the base durability line |
| 3 | Attach 4 uncommon wheels | Sets the top-speed baseline |
| 4 | Attach 1 uncommon engine | Sets the torque line |
| 5 | Attach starter fuel | Fills the mandatory slot |
| 6 | Open weapons tab, attach 2 common supports | Each support takes 1 of 4 weapon sockets |
| 7 | Read the stat panel, undo any red deltas | The panel will flag bad combinations before you leave the lot |
| 8 | Drive forward | Build is locked for the run |
If you want a deeper breakdown of how the support pieces slot into the car, the Build and Kill Zombies melee weapons guide covers the support taxonomy in detail. The two common supports you pick will define whether the build plays as a rusher, a tank, or a regen build, so it is worth picking those two parts deliberately rather than rolling randomly.
Identifying the Build and Kill Zombies Meta Car Right Now
The Build and Kill Zombies meta car is the build that the top of the server's leaderboard is using on a given patch, and as of the 2026-09-12 update it is a three-engine, full-rare-chassis, legendary-wheel build that the community calls the "Diesel Cruiser." It is not the cheapest build and it is not the most durable, but it is the build that clears wave 18 the fastest, which is the actual measurement that matters for the top of the leaderboard. The Diesel Cruiser exists because of a small balance change in the latest patch that increased the top-speed multiplier on rare and legendary wheels, so any car wearing those tiers is now roughly 12% faster on paved sections.
The Diesel Cruiser layout, listed in the exact order the build and kill zombies vehicle tab asks for each part (chassis → wheels → engines → fuel → blocks → weapons), runs at roughly 218 km/h top speed, ~3,800 HP durability, and 1,400 torque on the stat panel once the legendary wheels and rare chassis are both socketed — which is why the tab reuses the same part-tier priorities the leaderboard players do.
| Slot | Part Tier | Stat It Dominates |
|---|---|---|
| Chassis (1) | Rare | Durability line set to ~80% of legendary, half the cost |
| Blocks (4) | Rare | Weight pushed high enough for ramming without over-slowing |
| Wheels (4) | Legendary | Top speed +12% from patch buff |
| Engines (3) | Rare | Torque high enough to push the extra weight |
| Fuel (1) | Uncommon | Range large enough to hit wave 18 without refuel |
| Weapons (4) | 2 legendary + 2 rare | 4 sockets fully filled, one aura, one blade, two guns |
| Approx. total cost | ~28,000 cash | Roughly two hours of farming from a fresh account |
The meta build is not a beginner target, but the vehicle tab makes it cheap to learn because the stat panel will tell you in advance whether you are within 5% of the Diesel Cruiser's stat line. According to community reports, the panel shows a small "meta delta" number in the top-right corner once your build passes a hidden threshold (around 4 legendary parts equipped), and the closer to zero that delta is, the closer you are to the leaderboard build.
If you are aiming at the meta, the order in which you upgrade matters more than the order in which you roll, because the build and kill zombies vehicle tab re-computes your durability, top speed and torque lines only when a higher-tier part is socketed into an empty slot, so swapping a rare engine in before the rare chassis is anchored will lock a lower torque contribution into the final stat block. Top leaderboard players therefore save their first four SUPPORTS rerolls for legendary wheels, then add the rare chassis, then socket the third engine, then fill the two legendary weapons, because every earlier slot blocks a later tier from contributing its full buff — the same equip order the tab enforces when you press the "Apply All" button.
| Order | Upgrade | Reason |
|---|---|---|
| 1 | Legendary wheels | Single biggest top-speed jump after the 2026-09-12 patch |
| 2 | Rare chassis | Unlocks durability headroom for triple engines |
| 3 | Third engine | Only safe after the rare chassis is in place |
| 4 | Legendary weapons | Sockets must be empty before the swap |
| 5 | Block fills | Cosmetic stat padding, swap last |
For the broader weapon side of the meta, the Build and Kill Zombies legendary weapon page tracks the current legendary drop rates from the SUPPORTS machine. Legendary weapons are roughly 4% of the roll pool, so plan to spend 25-30 SUPPORTS rerolls per legendary part, which is why the meta build is gated behind roughly two hours of farming.
Finally, equip order inside the tab has a small but real effect on the meta build's stat line. Always attach the chassis first, then wheels, then engines, then fuel, then weapons. The vehicle tab applies parts in a strict sequence, and if you bolt a legendary engine onto a starter chassis and then swap the chassis for a rare, the panel will re-compute the durability line but leave the engine's torque contribution locked, which gives a slightly different stat total than the recommended order. It is a 2-3% difference, but at the top of the leaderboard that is the gap between rank 1 and rank 20.
Frequently Asked Questions
What is the Build and Kill Zombies vehicle tab in plain terms?
The vehicle tab is the in-build screen that opens when you press the build key on your personal lot. It shows your chassis, four wheel sockets, one to three engine bays, a fuel cell, and up to four weapon sockets, with a live stat panel on the right that updates every time you swap a part pulled from the CAR PARTS or SUPPORTS machines in the lobby.
How do I upgrade my car without spending real money?
Cash comes from driving distance and zombie kills, and the only way to upgrade is to spend that cash on the roll machines in the lobby, then drag the new parts into the vehicle tab sockets. The skill tree also offers a "Gold Roll" ability that improves the rarity curve, and investing in the Luck line on the tree gives every roll a better chance of landing a higher tier.
What is the cheapest car build that still clears early waves?
The community calls it the Block Cart: a starter chassis, two starter blocks, four starter wheels, one starter engine, one starter fuel, and one starter blade from the SUPPORTS machine. It costs around 2,500 cash to assemble and reliably clears the first 10 waves, which is enough to reach the Hacker Event 2026 boss and bank the reward.
Is the meta car worth chasing as a new player?
Not immediately. The Diesel Cruiser meta build costs roughly 28,000 cash and assumes you already have the rare chassis and legendary wheels. New players should run the Block Cart or the wallet build for the first two to three hours, bank the cash, and only push toward the meta once the stat panel's "meta delta" reads under 10%.
Do weapons go in the vehicle tab or the weapons tab?
Weapons drop from the SUPPORTS machine into the weapons tab, but they only deal damage on the track once they are attached to a socket inside the vehicle tab. The two screens are siblings, not the same screen, so you have to roll the weapon first and then equip it on the car before driving forward, otherwise it sits in your inventory unused.