
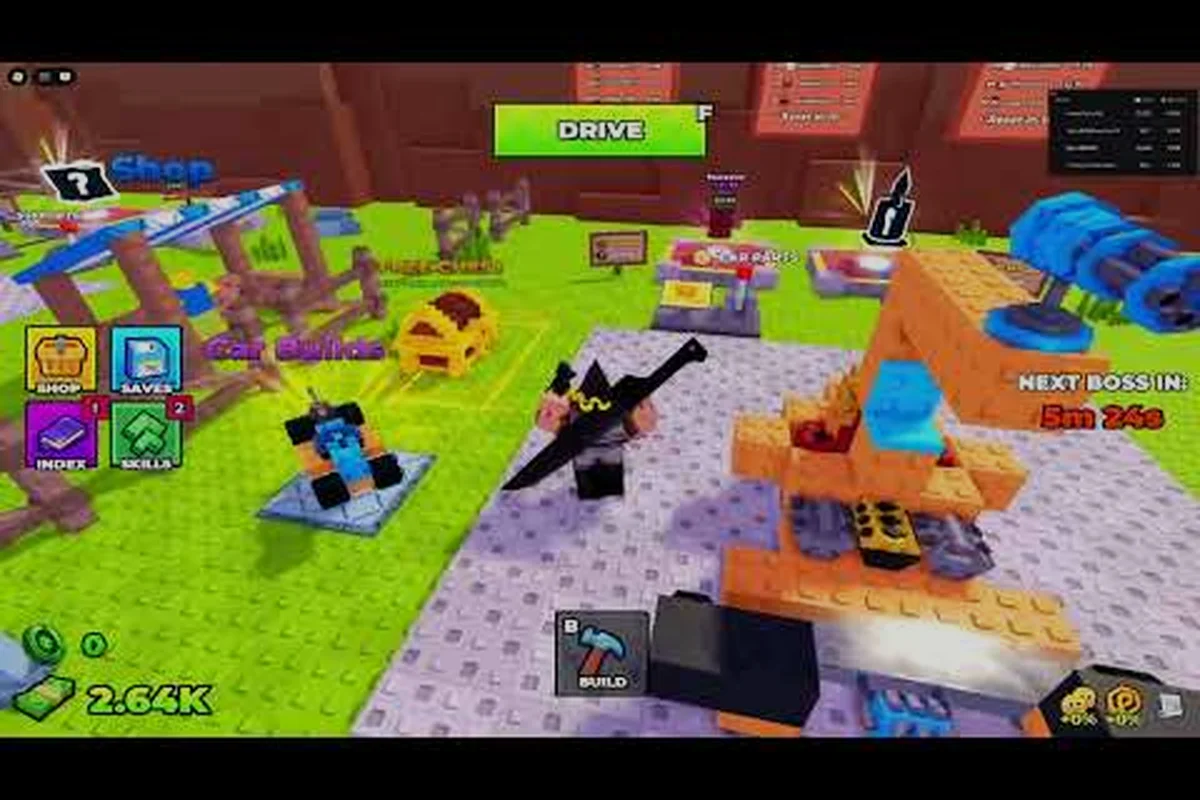
Your first hour in Build and Kill Zombies feels confusing because the game blends two loops in one screen: a build phase where you snap blocks onto a plot, and a drive phase where your car rams zombie waves down a long stretch of road. Knowing the controls cold turns that chaos into a routine, and the difference shows up fast in your cash haul at the end of a run. This Build and Kill Zombies tutorial walks through every input that actually matters on PC, so you stop hunting for buttons and start driving with intent.
The game launched under developer group Zombie Car Crusher (groupId 171280950) on Roblox on 2026-08-19, with the most recent patch dated 2026-09-12. According to the in-game About description, the loop is simple on paper — roll for parts, build, launch, and grind — but the on-screen keybinds are where most new players get stuck. Treat the sections below as a checklist, and revisit the parts that match whichever phase you keep fumbling through.
Understanding the Lobby Layout
Before any keybind matters, you need to understand the two distinct zones the game drops you into and the controls each one expects. The shared lobby is where you roll, build, and shop; the track is where those inputs flip into a driving sim. The lobby uses mouse-driven build tools plus letter keys to manage roll machines and inventory, while the track reuses a smaller subset of keys for movement and combat. Knowing which mode you are in prevents accidental inputs, like hitting E mid-drive and wondering why nothing happens.
The interface is built around three anchor points: your plot (where the car is built), the roll machine row (where parts and weapons come from), and the skill tree menu (where permanent buffs live). Each anchor has its own controls, and mixing them up is the most common reason a fresh player feels lost. According to community data gathered on the wiki, first-week players lose more time to control confusion than to actual zombie damage, which is why the next section maps every keybind cleanly.
Build and Kill Zombies Controls Map (PC)
Below is a full reference table for every confirmed control on PC, drawn from the in-game About text and community testing reported across the wiki. Treat this as your baseline cheat sheet until muscle memory takes over.
| Action | Keybind | Phase | Notes |
|---|---|---|---|
| Move camera | Mouse drag | Lobby / Track | Default Roblox right-click drag |
| Build / place part | Left click on plot | Lobby | Snaps to grid |
| Rotate part | R | Lobby | Rotates in 90° increments before placement |
| Delete part | Right click on placed part | Lobby | Refunds part to inventory |
| Open roll machine | E (interact prompt) | Lobby | Also used to pull a single roll |
| Confirm roll | CONFIRM (in-machine UI) | Lobby | Click the green button after category lock |
| Cycle roll category | Q | Lobby | Switches between BLOCKS, ENGINES, WEAPONS |
| Launch car (start run) | Green key on plot | Lobby | Begins drive phase |
| Steer car | A / D | Track | Standard left/right |
| Accelerate | W | Track | Hold to throttle |
| Brake / reverse | S | Track | Hold to slow or reverse |
| Fire equipped weapon | Left click (mouse) | Track | Aim with reticle |
| Exit run early | Menu → Return | Track | Forfeit remaining distance reward |
The Q and E pair deserves extra attention because it is unique to this game. Q cycles the roll machine's category filter, while E triggers a single pull on the currently selected category. The CONFIRM button only appears after the category is locked, so tapping E too quickly on a fresh machine can pull a part from the wrong pool. Players who treat the roll machine like a slot machine end up drowning in BLOCKS they cannot use; players who tap Q first, then E, and then CONFIRM end up with the ENGINES and WEAPONS they actually need. The same Q and E logic is the foundation of the dedicated Build and Kill Zombies roll tips breakdown if you want a deeper dive.
First Five Minutes: Build and Kill Zombies Tutorial Walkthrough
If you have never opened the game before, the first run is short and predictable — the game literally walks you through it. The flow is: load in, accept a free roll on the tutorial machine, snap the part onto your plot, hit the green launch key, drive forward, get swarmed, return to the lobby, repeat. Your goal in this stretch is not to win; it is to learn the muscle memory of the controls. According to community reports, players who skip the tutorial and try to grind immediately tend to get frustrated within 10 minutes because they do not yet know which key does what.
Spend those first five minutes deliberately. Tap Q on the roll machine, watch the category label change, then tap E to confirm the pull. Walk to the part, left click to place it on your plot, and right click once to remove it. Then press R to rotate, and left click again to lock it in. Finally, walk to the green launch key, press it, and try the A, D, W, S steering inputs for ten seconds before the zombies close in. This sequence alone teaches you seven of the eleven keybinds in the reference table above, which is why the tutorial exists.
Build and Kill Zombies Tutorial Phase Checklist
| Step | What to do | Keybind practiced | Common mistake |
|---|---|---|---|
| 1 | Spawn into shared lobby | None | Leaving tutorial area too fast |
| 2 | Approach the highlighted roll machine | E (interact) | Trying to roll from across the room |
| 3 | Cycle category once with Q | Q | Skipping straight to E |
| 4 | Pull a single part | E | Pulling 3+ parts before reading category |
| 5 | Walk part to your plot | Mouse drag camera | Forgetting to drag camera to find plot |
| 6 | Rotate then place part | R + Left click | Placing part at the wrong angle |
| 7 | Launch car | Green key on plot | Launching with empty plot |
| 8 | Steer and accelerate | A, D, W | Only pressing W and ignoring steering |
| 9 | Get destroyed and respawn | Auto | Trying to exit manually |
That ninth step is the one most new players fight against. When your car dies, the game respawns you in the lobby automatically, and there is no keybind to shortcut that respawn. Trying to menu out and back in is a waste of three to five seconds per attempt, and it adds up over a grinding session. Trust the auto-return and use the time to read the part you just earned.
Tips for New Drivers
Once the tutorial phase is out of the way, the game shifts into its real grind: roll, build, drive, repeat. Most of the Build and Kill Zombies tips that actually matter come down to discipline with the keybinds you just learned. The biggest difference between a player stuck at 500 meters per run and a player cruising past 5,000 meters is not luck — it is that the better driver has internalized the Q / E roll sequence and stops making inventory mistakes.
Three habits separate steady progress from spinning wheels. First, always tap Q before every E on the roll machine, because the machine remembers your last category and there is no visual flash warning you that you are about to burn cash on the wrong pool. Second, bind mentally that the green launch key only works on a non-empty plot, and walk the full perimeter of your car before hitting it, because a missing part mid-run is the most common cause of a 200-meter run. Third, treat the A and D keys as a steering pair, not a turn pair — gentle pressure keeps the car on the road; sharp taps send you into the grass and cost you speed.
Which Skill to Buy First
Permanent skills are the long-term payoff layer in Build and Kill Zombies, and they are the reason new players should not sink every cash drop into rolls. The skill tree branches into Luck, More Support, and Gold Roll paths, and according to community data, the early-game optimal order is Luck I → Luck II → More Support I → More Support II → Gold Roll I. Stacking Luck first improves the rarity spread on every roll, which compounds with every other part of your run. Pushing into More Support early gives you passive cash bonuses that fund later rolls. Gold Roll is the most expensive node and should be the fifth skill you buy, not the first.
| Skill node | Effect category | Approx. priority | Notes |
|---|---|---|---|
| Luck I | Roll rarity | 1st | Cheap and compounds with every roll |
| Luck II | Roll rarity (stacks) | 2nd | Doubles Luck I's effect at the time of writing |
| More Support I | Passive cash | 3rd | Funds faster skill purchases |
| More Support II | Passive cash (stacks) | 4th | Required for Gold Roll viability |
| Gold Roll I | Cash per roll | 5th | Expensive; skip until More Support II is online |
| 2x Permanent Luck (game pass) | Permanent luck boost | Optional | Listed at 149 R$ per the official Roblox pass API |
The 2x Permanent Luck game pass is a separate purchase from the skill tree, and according to the Roblox game pass API, it is priced at 149 R$ (a third-party guide site lists 109 R$, but the API data is the authoritative source for this comparison). If you decide to spend Robux, the pass stacks with the in-skill Luck nodes, so it is a clean multiplier rather than a replacement. If you prefer to stay free-to-play, lean into the Luck I → Luck II opening and accept that progression is slower.
Build and Kill Zombies Keybinds Across Phases
Players who switch between phases constantly — building, then driving, then rebuilding mid-run — are the ones who benefit most from memorizing how the same keys behave differently in each phase. The keybind that trips people up most often is E, which means "interact with a roll machine" in the lobby and "fire a specific weapon" on the track for some loadouts. Confusing the two costs you rolls in one phase and ammo in the other, so it is worth slowing down for half a second before tapping any letter key on a fresh screen.
The cleanest mental model is: in the lobby, letter keys manage your inventory (Q, E, R); on the track, letter keys manage your car (W, A, S, D) and the mouse handles weapons. Once you accept that split, the controls stop feeling random and start feeling layered. If you want a side-by-side reference for the roll-specific side of this, the Build and Kill Zombies best roll guide maps the Q and E controls onto the rarity hunt in detail.
Quick Reference: Lobby vs. Track Keybinds
| Keybind | Lobby behavior | Track behavior |
|---|---|---|
| Q | Cycle roll category | No function |
| E | Interact / pull one roll | Sometimes weapon-specific |
| R | Rotate build part | No function |
| W | No function | Accelerate |
| A | No function | Steer left |
| S | No function | Brake / reverse |
| D | No function | Steer right |
| Left click | Place part | Fire weapon |
| Right click | Delete part | Aim (default Roblox) |
| Mouse drag | Move camera | Move camera |
A common question is whether there is a way to rebind these keys. As of the 2026-09-12 patch, the controls are fixed at the engine level and there is no remap menu in the settings. Mobile and console ports of the game use on-screen buttons mapped to the same actions, but the PC version is locked. The official Build and Kill Zombies About description does not currently mention remap support, so do not wait for it before committing the defaults to muscle memory.
Controls Mistakes New Players Make
Most control mistakes fall into one of three buckets, and each has a known fix. The first bucket is inventory mismanagement, which is the Q / E sequence in the wrong order. Players who tap E three times in a row on a fresh roll machine will pull three random parts from the same category they used last, which is almost always BLOCKS because that is the first category a new account lands on. The fix is a single tap of Q before every E, and a CONFIRM click before walking away.
The second bucket is launch-time mistakes, which means hitting the green key on a half-built car. The green launch key validates that at least one BLOCK and one ENGINE exist on the plot, but it does not check for weapon mounts. Players who launch with no weapons get 100 to 200 meters before the first zombie wave catches up, while players who launch with even a single WEAPON part attached clear 800 to 1,200 meters in the same time. The fix is a perimeter walk of the car before launch, with a specific eye on top-mounted slots.
The third bucket is mid-run steering mistakes, which means treating the car like a top-down arcade vehicle instead of a physics-driven one. Holding W straight through a turn flips the car. The fix is to release W during a hard turn and feather A or D to keep the nose pointed down the road. According to community testing on the official Roblox page, players who feather the throttle clear roughly 1.5x the distance of players who hold W continuously.
Mistake → Fix Table
| Mistake | Symptom | Fix |
|---|---|---|
| Skip Q before E | Inventory full of one category | Always tap Q first |
| Launch with no weapon | Early wipe at 100m | Mount a WEAPON part before green key |
| Hold W in turns | Car flips, lose 30s of progress | Release W, feather A/D |
| Use mouse click during driving to place part | Inventory drops, no build | Mouse click on track = fire, not build |
| Menu out after death | Wasted 3-5s per attempt | Trust the auto-return to lobby |
| Spend all cash on rolls | No skill progression | Roll 3 parts, then dump cash into skills |
The "roll 3 parts, then dump cash into skills" rhythm is the single most impactful habit a new player can adopt. It is also why the Build and Kill Zombies beginner guide opens with a budget rule rather than a build rule: you cannot build what you cannot afford to roll, and you cannot afford to roll if you never invest in skills. Three rolls per run is enough to keep your plot updated, and the remaining cash goes to the Luck I → Luck II opening that compounds forever after.
Build and Kill Zombies Tips for the First 30 Minutes
The first 30 minutes are about establishing routines, not about chasing leaderboard runs. Spend minutes 0 to 5 on the tutorial flow described above. Spend minutes 5 to 15 on five or six short drives with whatever parts the tutorial machine hands you, focused entirely on the A, D, W, S controls. Spend minutes 15 to 25 on building a real car — at minimum one BLOCK, one ENGINE, and one WEAPON — and pushing that car for a single long run to test how the build holds up. Spend minutes 25 to 30 on the skill tree, buying Luck I and More Support I if your cash allows.
By the end of that 30-minute block, you should know the controls cold and have a working car that survives at least one zombie wave. That is the minimum viable starting point. Anything past 30 minutes is optimization, and the optimization tracks (rarity chasing, boss strategy, server-boss coordination) are covered in detail in the Build and Kill Zombies how it works walkthrough, which builds directly on the control foundation laid out here.
30-Minute Progression Snapshot
| Minute | Goal | Keybinds practiced | Skill to buy if possible |
|---|---|---|---|
| 0–5 | Tutorial flow | Q, E, R, left click | None |
| 5–15 | Short drives | W, A, S, D | None |
| 15–25 | First real build + drive | All of the above | Luck I |
| 25–30 | Skill tree dive | Menu navigation | Luck I, More Support I |
The table is intentionally conservative because most new players overestimate how far their first car will go. A realistic first build survives one wave, earns 200 to 400 in cash, and resets. That is fine. The compounding comes from the skill tree, not from any single run, and the skill tree only moves when you stop chasing runs and start chasing nodes. Treat the controls as a solved problem by minute 15 and the rest of the game opens up.
Build and Kill Zombies PC Controls: Edge Cases
A few edge cases do not fit neatly into the standard reference table, but they come up often enough to flag. The first is the menu escape key: pressing ESC on PC opens the Roblox menu overlay, not an in-game settings panel. To return to the game, press ESC again or click outside the menu. The second edge case is the chat box: pressing / opens the Roblox chat, which is useful for co-op coordination but will also hijack letter keys until you press Enter or Escape. The third is the inventory overflow case, which fires if you roll faster than you can build: the game does not currently warn you, it just stops accepting new parts until you free a slot by deleting or placing one.
Players who want a fuller picture of how the controls interact with the wider game loop should also read the Build and Kill Zombies boss tips breakdown, which assumes you already have the build and drive keybinds locked in and focuses on the combat inputs that matter during a server-boss event.
Edge Case Quick Reference
| Situation | Symptom | What to press |
|---|---|---|
| Accidentally opened Roblox menu | Screen grays out | ESC again to close |
| Typing in chat, want to exit | Letter keys act as chat input | Enter to send, ESC to cancel |
| Inventory full, rolls blocked | Roll machine does nothing | Delete or place a part to free a slot |
| Camera stuck inside a part | Cannot see plot | Hold right click and drag to back out |
| Plot blocked by another player | Cannot place parts | Move to a different plot, or wait |
Most of these resolve in under five seconds once you recognize the symptom. The one that costs the most time is the camera-inside-a-part case, which is why the right-click drag to escape is worth practicing in the tutorial rather than discovering it mid-run.
Frequently Asked Questions
What are the most important Build and Kill Zombies keybinds to learn first?
The five you should drill in the tutorial are Q, E, R, left click, and the green launch key. Q cycles the roll machine category, E pulls a single part, R rotates a part before placement, left click places the part on your plot, and the green launch key starts the drive phase. Mastering those five covers roughly 70% of the input surface and lets you finish the tutorial in a single attempt.
Are Build and Kill Zombies PC controls the same on every server?
Yes, the keybinds are hardcoded at the engine level and do not vary by server, region, or game pass. The Roblox game pass API confirms the 2x Permanent Luck pass at 149 R$ is a multiplier on the same control scheme, not a remap. According to community data, no private server toggle changes the keybinds either, which is intentional so co-op players can communicate using the same action labels.
Can I rebind Build and Kill Zombies controls on PC?
No remap menu exists as of the 2026-09-12 patch. The game ships with the default keybinds shown in the reference table above, and the official About text on the Roblox listing does not advertise a remap option. If you are on a non-US keyboard layout, the letter keys still fire correctly because Roblox maps the physical key location rather than the character printed on the cap.
Why does my E key sometimes not work on the roll machine?
The E key only fires when you are within the machine's interaction range and the roll UI is open. If you are too far away, the prompt does not appear and the press registers as a no-op. If the roll UI is open but locked behind a CONFIRM prompt, E will not advance until you click CONFIRM. Tap Q to refresh the category, then E to pull, then CONFIRM — that three-step sequence is the one most new players skip.
How do Build and Kill Zombies controls differ on mobile or console?
Mobile and console builds use on-screen touch buttons mapped to the same actions: a virtual D-pad replaces WASD steering, a fire button replaces left click, and the roll machine uses on-screen category tabs instead of the Q key. The build phase still uses a left tap to place and a right tap to delete, mirroring the PC mouse logic. Players who switch between PC and mobile in the same household should expect a short relearning curve of about 10 to 15 minutes per direction.