
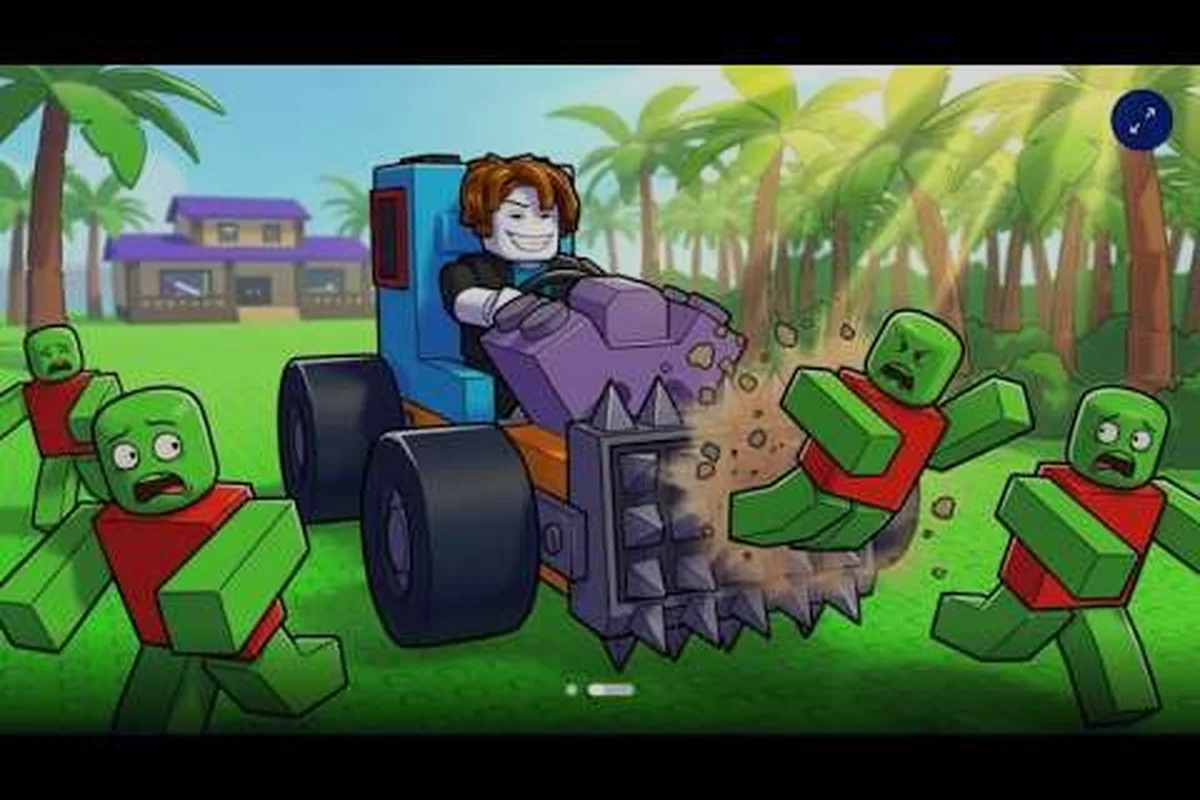
Every Build and Kill Zombies server eventually pivots from grinding zombies to chasing a boss spawn, because that is where the rarest blueprints, the Gold Roll I unlock, and the "You defeated the King 1x1x1x1" badge actually drop. The trouble is that boss attacks in this Roblox game are not telegraphed the way action-RPG players expect, so a fresh car gets flattened long before anyone reads the chat. This guide maps the attack patterns, tells, and counter-windows you can use right now, and pairs each one with the best car and best weapon choices that real players report from current servers.
How Boss Attacks Work in Build and Kill Zombies
Build and Kill Zombies treats bosses as large NPCs that spawn on a fixed cadence inside the same map where you farm regular zombies. The King 1x1x1x1, the headline enemy of the Hacker Event 2026, is a multi-phase model that switches attack patterns as its health bar drops, and it shares the same hitbox rules as any other car target. According to the official Build and Kill Zombies Roblox game page, the boss is a limited-time event enemy that tracks players anywhere on the map, so reading its tells matters more than chasing it with a faster car.
The core combat loop is identical to fighting a regular zombie: drive into the boss, deal contact damage with whatever weapons are mounted on the front of your car, and back off before the boss retaliates. The difference is that boss attacks hit much harder, and most of them include a wind-up frame that the camera does not always center on. Community testing reported by players on YouTube and Discord threads suggests the wind-ups run between 0.4 and 1.2 seconds, which is fast enough that you have to memorize the order of the combo rather than react on the fly.
Boss Attack Categories You Will See
| Category | Trigger | Wind-up | Counter Window |
|---|---|---|---|
| Slam | Boss is in melee range | 0.6 s arm raise | Drive backward 4-6 studs |
| Charge | Player is 12+ studs away | 0.4 s shoulder dip | Sidestep 90° right |
| Projectile | Player is line-of-sight | 1.0 s eye flash | Break line-of-sight behind a wall |
| AOE ring | Boss HP under 50% | 1.2 s stomp | Drive 10+ studs away from center |
| Summon | Boss HP under 25% | 0.8 s raise | Focus summoned adds first |
These five categories cover the attacks most players encounter during the 2026 Hacker Event. The boss picks from the pool based on your distance, the current phase, and how long you have been in the arena, which is why a stale car that worked in Phase 1 suddenly feels useless in Phase 3.
The Three Phases of King 1x1x1x1
| Phase | HP Threshold | New Attacks Added | What Changes |
|---|---|---|---|
| Phase 1 | 100% to 66% | Slam, Charge | Boss walks, no AOE |
| Phase 2 | 66% to 33% | Projectile, Summon | Boss gains ranged options, summons 2 zombie adds |
| Phase 3 | 33% to 0% | AOE ring added | Boss teleports short distances, ring on every 3rd slam |
Players report that Phase 2 is where most wipes happen, because the projectile forces you to break line-of-sight while the boss summons adds that block your drive path. Phase 3 looks chaotic but is actually easier once you learn to bait the AOE ring into a clear area and ram the boss during the recovery window.
When the Boss Spawns: Timing and Schedule
Build and Kill Zombies does not show a global boss timer, which is the single most common source of confusion. The King 1x1x1x1 is tied to the Hacker Event 2026, and the boss spawn is event-driven rather than tied to a 30-minute or hourly server clock. Community reports (as of September 2026) describe three reliable triggers that bring the boss into the map.
Common Boss Spawn Triggers
| Trigger | What to Do | Reliability |
|---|---|---|
| Server population peak | Wait until the server has 20+ active players | High |
| Hacker Event countdown | Watch the in-game banner, it counts down 5 minutes before the boss appears | High |
| Car-Parts event reset | A 2x Cash window often lines up with a boss window | Medium |
| Manual admin spawn | Rare, only during weekend events | Low |
The two high-reliability triggers are the event banner countdown and the server-population peak, which is why most boss kills happen between 30 and 90 minutes into a server's life. A fresh server with fewer than 10 players will not usually see a boss until the population builds up or the next event banner starts.
Reading the In-Game Boss Schedule
There is no in-game calendar, but the Hacker Event 2026 banner cycles on a roughly 60 to 90 minute rotation, and the boss appears during the final 5 minutes of the cycle. Players who want to skip the wait usually hop to a full server and watch the chat for "boss incoming" pings, because the banner is hard to read at the corner of the screen while driving. If you want to plan a session, treat the boss as a roughly hourly event with a 5-minute warning window, and budget your skill spending so that you can afford Gold Roll I by the time the next boss rotation starts.
Best Car for Boss Fights
The best car for boss fights in Build and Kill Zombies is the one that survives Phase 2's combined projectile-plus-summon pressure while still dishing out enough contact DPS to push through Phase 3. Pure damage builds without BLOCKS front armor get one-shot by the slam, and pure tank builds without enough weapon slots run out of DPS before the 33% HP threshold. The general rule reported by players is to stack 4 to 6 weapon slots, 2 to 4 BLOCKS on the front, and one high-tier ENGINE so you can reposition between attacks.
Car Layout Priorities for Bosses
| Slot | Best Choice | Why It Matters for Bosses |
|---|---|---|
| Front armor | 2-4 BLOCKS | Absorbs slam and projectile chip damage |
| Front weapons | 4-6 SUPPORTS | More weapons equal more contact DPS |
| Center | 1 high-tier ENGINE | Lets you retreat and re-engage fast |
| Wheels | 2-4 WHEELS (mid-tier) | Stability matters more than top speed |
| Fuel | 1 FUEL (any tier) | A stranded car during Phase 3 AOE is a wipe |
If you want a pre-built reference, the community tier list of best cars for boss fights tends to favor long, flat-front layouts with a BLOCKS bar across the nose and 4-6 weapon SUPPORTS stacked behind it. Short, tall cars tip over during the AOE ring, and pyramid-shaped builds lose their weapon slots on the first slam. The flat-front design also gives you a wider hitbox so the boss's melee attack has a higher chance of hitting your BLOCKS instead of a weapon you cannot afford to lose.
Common Car Mistakes to Avoid
The most common mistake is rebuilding your entire car right before the boss spawns, because the in-game car-parts machine does not refund spent rolls, and a half-finished car cannot survive Phase 2. The second most common mistake is putting all your BLOCKS in a single row across the nose, because the boss's projectile pierces straight through a flat plane, and a staggered BLOCKS layout will absorb two hits instead of one. The third mistake is using FUEL as a stat dump, because the boss arena has fuel pickups, and a car that runs out of fuel mid-fight cannot retreat to reset the slam counter. The full car-build workflow, including the Q to pick a category and CONFIRM to lock it in, is covered in the car build mode walkthrough, which is a useful pre-boss read if your current car keeps folding in Phase 1.
Best Weapon for Boss Fights
The best weapon for boss fights in Build and Kill Zombies is the one with the highest DPS-per-hit combined with the fastest swing recovery, because boss fights are about landing as many hits as possible inside a 6- to 10-second safe window between attacks. The SUPPORTS machine is what unlocks the number of weapons you can mount, which is why most boss-ready cars use the Gold Roll I skill to roll high-rarity weapons. According to the Roblox game-pass API, the 2x Permanent Luck pass costs 149 Robux, and that pass directly improves your chance of pulling a Legendary-tier weapon from the SUPPORTS machine.
Weapon Tier Reference for Bosses
| Rarity | Base Damage | Best Use Case | Drop Source |
|---|---|---|---|
| Common | Low | Trash adds in Phase 2 | SUPPORTS machine, low rolls |
| Uncommon | Medium | Phase 1 boss DPS | SUPPORTS machine, mid rolls |
| Rare | High | Phase 2 sustained DPS | SUPPORTS machine, high rolls |
| Legendary | Very high | Phase 3 burst windows | Gold Roll I, event boss loot |
The Legendary tier is the one most players chase for boss fights, but a fully-slotted Rare build is still viable if your BLOCKS layout can survive the slam. The drop rate for Legendary is low enough that you should never burn your cash on a single roll, and the community recommends stacking 100k+ before attempting a Gold Roll, because the machine eats your cash whether you land a Legendary or a Common. The full Legendary-weapon guide, including which SUPPORTS machines are worth farming, is in the legendary weapon breakdown, which is the natural next read once you have your boss car ready.
Weapon-Stack Strategy by Phase
| Phase | Recommended Front Weapons | Playstyle |
|---|---|---|
| Phase 1 | 4-6 Rare, mixed SUPPORTS | Drive in, ram, back out |
| Phase 2 | 2-4 Rare + 2 Legendary | Focus adds first, then boss |
| Phase 3 | 4-6 Legendary | Bait AOE, ram during recovery |
Players who swap to a fully-Legendary stack in Phase 3 report faster kill times, because the boss's AOE ring forces a clean reset every cycle, and the recovery window is short. A mixed Rare-and-Legendary loadout is a strong Phase 2 option, because you need burst damage to clear the summoned adds before turning back to the boss.
Boss Attack Pattern Deep Dive
The five attack categories in the table earlier each have a distinct visual tell, and reading those tells is what separates a first-try kill from a thirty-try grind. The King 1x1x1x1 model is large, which makes its wind-up animations easier to read than smaller boss variants, but the camera in Build and Kill Zombies tends to center on your car rather than the boss, so you have to actively track the boss's body to catch the tell.
Reading the Slam Tell
The slam is the most common Phase 1 attack, and it is also the deadliest, because it does roughly 30% of your HP in a single hit if you do not have BLOCKS in front. The tell is a one-second arm raise where the boss lifts its right arm above its head and holds it there for a frame. The counter is to drive backward 4 to 6 studs during the hold, then re-engage during the recovery. Players who try to sidestep instead of backing up get clipped by the slam's edge hitbox, which is wider than the central pillar.
Reading the Charge Tell
The charge is a Phase 1 to Phase 2 attack, and it triggers when you are more than 12 studs away from the boss. The tell is a short shoulder dip on the boss's left side, and the boss accelerates in a straight line for about 2 seconds. The counter is to sidestep 90 degrees to your right the moment you see the dip, because the boss does not adjust its path mid-charge. Players who try to outrun the charge head-on usually lose, because the boss's base speed is faster than a mid-tier car on flat ground.
Reading the Projectile Tell
The projectile attack is a Phase 2 unlock, and it is the attack most players fail to react to, because the eye-flash tell is short and easy to miss during a chase. The tell is a one-frame bright flash on the boss's face, and the projectile is a fast-moving orb that does about 20% HP on direct hit. The counter is to break line-of-sight behind any wall or ramp, because the projectile cannot track around cover. Players who keep driving in a straight line during a projectile attack take the full hit, and two consecutive projectiles will usually wipe a car without BLOCKS.
Reading the AOE Ring Tell
The AOE ring is a Phase 3 unlock, and it is the attack that forces you to reset the fight every 15 to 20 seconds. The tell is a 1.2-second stomp where the boss plants both feet and the ground around it glows red, and the AOE expands in a 15-stud radius. The counter is to drive 10+ studs away from the boss before the stomp lands, because the AOE does roughly 40% HP on direct hit and applies a short slow debuff. The recovery window after the AOE is 3 seconds long, which is the safest DPS window in the entire fight, and a Legendary-stacked car can land 6 to 8 weapon hits in that window.
Reading the Summon Tell
The summon attack is a Phase 2 unlock, and it spawns two zombie adds that block your drive path. The tell is a 0.8-second raise where the boss lifts both arms and the ground cracks beneath it. The counter is to focus the adds first, because the adds do not despawn until they are killed, and a single add wedged in your drive path will turn the next slam into a guaranteed hit. Once the adds are down, the boss is briefly stunned, which is a free 2-second DPS window that most players miss because they are still chasing the boss.
Skill Tree and Cash Setup Before a Boss Spawn
The best car and best weapon for boss fights only matter if you have the right skills unlocked, and the skill tree in Build and Kill Zombies is a permanent progression line that resets only when you prestige. The intended order, reported by community testing in the Build and Kill Zombies progression video, is Luck I, Luck II, More Support I, More Support II, and finally Gold Roll I, because Luck improves your chance of high-rarity parts on the CAR PARTS machine, and More Support adds extra weapon slots to the front of your car.
Skill Spending Priority
| Skill | Cost Tier | Why It Matters for Boss Fights |
|---|---|---|
| Luck I | Low | Improves part rarity rolls |
| Luck II | Medium | Doubles down on rarity for boss-ready parts |
| More Support I | Medium | Adds 2 weapon slots |
| More Support II | High | Adds 2 more weapon slots |
| Gold Roll I | High | Unlocks the only path to Legendary-tier parts |
Players who skip Luck II to rush Gold Roll I end up with low-rarity parts, because the Gold Roll is gated by your current Luck value. The More Support pair is what lets you mount 4 to 6 weapons, which is the DPS threshold you need to push the boss through Phase 2 before the population thins out.
Cash Farming Before the Boss
The best cash farm before a boss spawn is distance-based, because Build and Kill Zombies awards cash per stud traveled and per zombie kill, and the boss arena is usually a long drive from the spawn point. Players who spend 10 to 15 minutes doing laps before the boss event will arrive with enough cash for a full Gold Roll, while players who try to grind right up to the boss banner will end up rolling with whatever they have. The full cash-farming loop, including the 2x Cash windows that line up with boss rotations, is covered in the tier-list of best cars and weapons, which is a useful pre-boss reference if you are not sure whether your current car is worth fielding.
Boss Strategy: Step-by-Step Kill Plan
A clean boss kill in Build and Kill Zombies takes about 3 to 5 minutes, and the players who land the kill on the first try are usually the ones who follow a repeatable loop rather than improvising. The loop below is what most successful runs in the 2026 Hacker Event look like, and it is designed to minimize Phase 2 wipes.
Pre-Boss Setup (5 Minutes)
| Step | Action | Reason |
|---|---|---|
| 1 | Check skill tree | Confirm Luck II, More Support II, Gold Roll I are unlocked |
| 2 | Verify car layout | 4-6 weapons, 2-4 BLOCKS front, 1 ENGINE, fuel stocked |
| 3 | Cash check | 100k+ in hand for a Gold Roll if you land a part |
| 4 | Position near arena | Park 20 studs from the boss spawn so you arrive first |
| 5 | Watch banner | Wait for the 5-minute countdown to start |
Combat Loop During the Fight
| Phase | Action | When to Reset |
|---|---|---|
| Phase 1 | Ram during recovery, back off during slam | Reset if HP drops below 50% |
| Phase 2 | Clear adds, then boss, break LOS during projectile | Reset if HP drops below 40% |
| Phase 3 | Bait AOE, ram during 3-second recovery | Reset if HP drops below 30% |
The reset threshold matters because the boss enrages at low HP, and a single wipe at 10% HP means a full restart from the arena entrance. The cross-class comparison of car archetypes that handle the reset loop best is in the car-vs-weapon comparison, which is a useful read if your current car keeps forcing a reset at the Phase 2 threshold.
Frequently Asked Questions
When does the boss spawn in Build and Kill Zombies?
The boss spawns during the Hacker Event 2026, which is the only confirmed King 1x1x1x1 window as of September 2026. The in-game banner counts down the final 5 minutes of a roughly 60 to 90 minute rotation, and the boss appears the moment the countdown ends. Full servers with 20+ active players tend to see the boss more reliably, so hopping to a populated server is the fastest way to trigger a spawn.
What is the best car for the boss in Build and Kill Zombies?
A flat-front car with 4 to 6 weapon SUPPORTS, 2 to 4 BLOCKS across the nose, 1 high-tier ENGINE, and a mid-tier FUEL is the most reliable boss layout. The flat front gives the boss's slam a wider BLOCKS hitbox, and the 4 to 6 weapons give you enough DPS to push through Phase 2 before the population thins out. Pyramid-shaped and short-tall cars fail the AOE ring in Phase 3, because they tip over and lose their weapon slots on the first stomp.
What is the best weapon for the boss in Build and Kill Zombies?
Legendary-tier weapons from the SUPPORTS machine via Gold Roll I are the best boss weapons, because they do the most damage per hit and have the fastest recovery. A fully-Legendary stack is the safest Phase 3 build, but a 2 Legendary + 4 Rare mix is a strong Phase 2 build that lets you clear the summoned adds without burning your Legendary durability. Pulling a Legendary requires the 2x Permanent Luck pass, which costs 149 Robux, and at least 100k in cash to cover the roll.
What is the Build and Kill Zombies boss schedule?
There is no in-game boss schedule, but the Hacker Event 2026 banner cycles on a roughly 60 to 90 minute rotation, and the boss spawns during the final 5 minutes of the cycle. The 2x Cash windows often line up with the boss rotation, so you can stack cash during the first 50 minutes and burn it on a Gold Roll during the boss window. Server population is a secondary trigger, and a server with 20+ active players is much more likely to see a boss than a quiet server with fewer than 10.
Can I solo the King 1x1x1x1 boss?
Yes, but only with a fully-optimized car and the Gold Roll I skill unlocked. A solo run takes 3 to 5 minutes, and the hardest phase is Phase 2, because the projectile and summon attacks force you to split your attention between the boss and the adds. Most solo kills are landed by players with a Legendary-stacked car and 4+ BLOCKS, and a multi-player run is safer if your car is still mid-tier.