
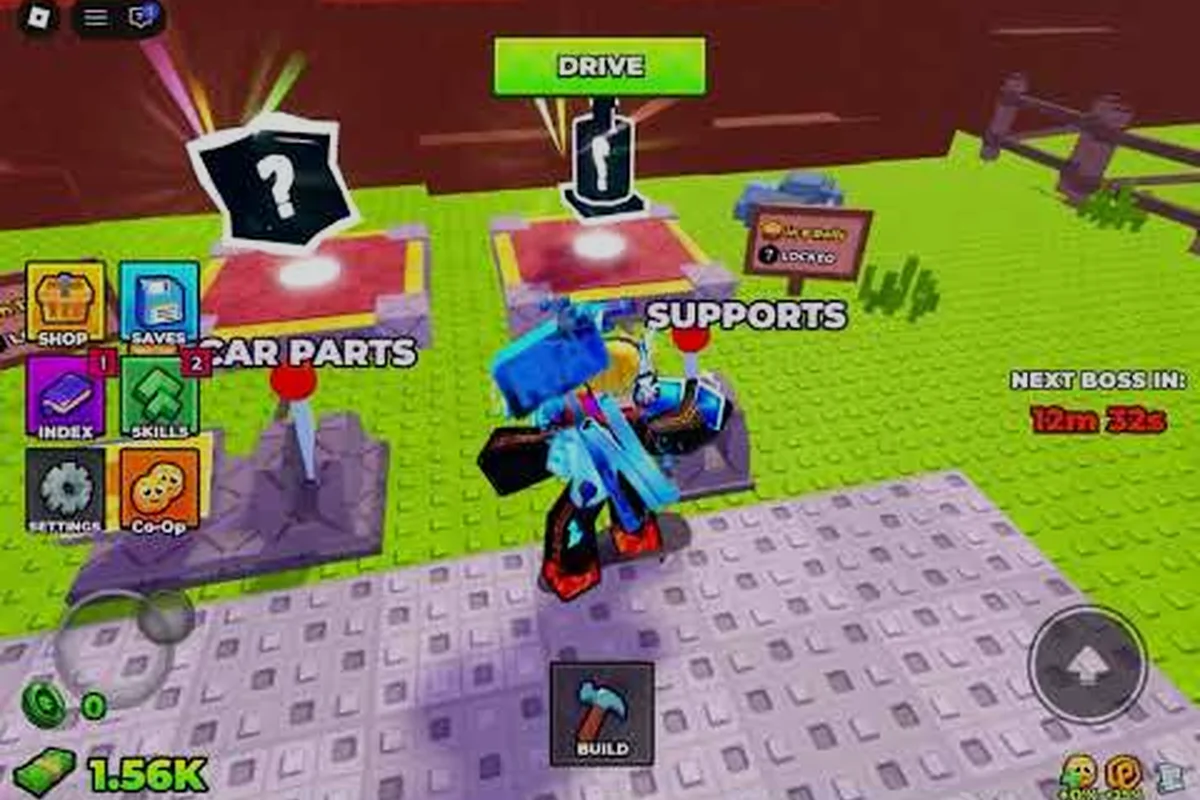
Pushing your Build and Kill Zombies max distance further comes down to three things: a light chassis, a fuel that matches your wave goal, and the habit of reading the zombie spawn pattern before the horde catches up. Most players stall out long before the King 1x1x1x1 event boss appears, not because the run is too hard, but because their car is too heavy to keep moving once the first elite wave lands.
How a Build and Kill Zombies Run Actually Works
A run in Build and Kill Zombies starts the moment you press play in the lobby. Your car spawns at the garage with whatever parts you rolled, you start at the first tile, and zombies pour in from the edges of the map in timed waves. Every tile you cross adds to your distance counter, and every zombie you crush or shoot adds to your cash payout at the end of the run. The further you push, the more waves you clear, and the more waves you clear, the bigger the reward multiplier stacked on top of your base cash.
According to the Build and Kill Zombies developer profile on Roblox, the game launched on 19 August 2026 and updates roughly every three weeks, with the most recent patch landing on 12 September 2026. That cadence matters for your run guide: balance changes to fuel economy, block weight, and zombie speed all roll in silently, so a build that worked two patches ago may now leave you stranded at wave 12.
Core Loop: Distance, Waves, and Rewards
The core loop is a three-resource race against time. You spend engine durability and fuel reserves to keep moving, you spend bullets and blade durability to thin the horde, and you earn cash and skill XP with every zombie cleared. The distance counter is your score, the wave counter is your difficulty gauge, and the reward screen at the end of a run is what actually feeds your next build.
| Resource | What It Does | Where It Drains Fastest | How to Replenish |
|---|---|---|---|
| Fuel | Powers the engine to move forward | Steep inclines, heavy chassis, idle revving | Pickup drops (rare), fresh roll at garage |
| Durability | Keeps wheels, blades, and blocks attached | Wall impacts, zombie swarms, boss stomp | Runs only — no mid-run repair |
| Bullets | Ammo for gun supports on your car | Dense zombie waves, ranged zombies | Pickup drops, base ammo at garage |
| Cash | Buys rolls and permanent upgrades | End-of-run payout, no in-run spending | Survive further, clear more waves |
Most players treat fuel like a sprint resource and try to conserve it, but the fastest way to increase your Build and Kill Zombies max distance is actually the opposite mindset: a controlled burn that keeps your car just fast enough to outpace the leading edge of the wave.
Why Most Runs End Early
The single biggest reason runs die before wave 20 is weight creep. You start with a tight three-block chassis and a light engine, and by wave 8 you have added two armor blocks, a wide plow, and a heavy fuel tank because the zombies started hitting harder. Every added block costs you top speed, and every lost mile per hour means the wave catches up a few seconds earlier. By wave 15 the math no longer works, and the horde simply rolls over you.
Players who push past wave 25 consistently follow a different rule: they never add a part that does not earn its weight back in cash per minute. A plow that costs 80 kg has to clear at least 40 extra zombies per minute to justify the speed loss. If it does not, the part comes off, and the car gets lighter for the next run.
Build and Kill Zombies Wave Guide: How Many Waves Are There
The wave system is what gates your distance ceiling. Each wave spawns more zombies than the last, introduces tougher zombie types, and shrinks the safe travel corridor at the edges of the map. Once a wave starts, you have a fixed amount of time to clear the required zombie count or push past the wave marker tile — fail either, and the run ends.
Wave Difficulty Curve
| Wave | Zombie Count (approx.) | New Threat Introduced | Distance Marker |
|---|---|---|---|
| 1-5 | 15-40 per wave | Basic walkers, slow runners | 0 - 1,500 studs |
| 6-10 | 50-90 per wave | Crawlers (low profile, hard to hit) | 1,500 - 3,500 studs |
| 11-15 | 100-160 per wave | Sprinter zombies, armored variants | 3,500 - 6,000 studs |
| 16-20 | 180-260 per wave | Bombers (explode on contact), tanks | 6,000 - 9,000 studs |
| 21-25 | 280-400 per wave | Mixed elite squads, first mini-boss spawns | 9,000 - 13,000 studs |
| 26+ | Scaling | King 1x1x1x1 event, gold-drop elites | 13,000+ studs |
The wave numbers above are based on community testing as of the September 2026 patch, and the dev's fast update cadence means exact counts may shift by 10-15% in a future patch. The shape of the curve, though, is stable: expect a sharp jump at wave 11 when sprinters arrive, and another sharp jump at wave 16 when bombers start spawning.
Reading the Wave Marker
Every wave has a wave marker tile that glows on the ground. The tile tells you two things: how many zombies you must clear to satisfy the wave, and the distance bonus you will earn if you pass it before the timer expires. The wave timer does not pause when you stop to fight, which is why a fast car that skips fights usually loses the distance bonus and a slow car that clears everything usually loses the timer. The sweet spot is a car fast enough to clear most zombies, slow enough to keep its engine cool, and durable enough to survive a few bomber detonations.
If you want a full walkthrough on the lobby interface, plot layout, and how to enter Build Mode before tackling the wave system, that guide pairs well with this one. Players who skip the lobby tutorial often misread the wave marker color, which is how green means clear and red means fail.
Choosing a Chassis for Maximum Run Distance
Your chassis is the single most important decision for your Build and Kill Zombies max distance goal. Everything else — engine, fuel, supports, blades — is layered on top, and a bad chassis choice will hold back even the best parts. The rule of thumb is simple: lighter is further, heavier is safer, and you need to find the line between them for your current skill level.
Chassis Tier Comparison
| Chassis Type | Weight Class | Top Speed | Durability | Best Distance Range | Skill Level |
|---|---|---|---|---|---|
| Speedster (3-block base) | Light | Very high | Low | 0 - 6,000 studs | Beginner |
| Balanced (4-5 block base) | Medium | High | Medium | 4,000 - 12,000 studs | Intermediate |
| Tank (6+ block base) | Heavy | Medium | High | 8,000 - 15,000 studs | Advanced |
| Hybrid (asymmetric 5-block) | Variable | High | Medium-high | 10,000+ studs | Advanced |
Speedster chassis are the Build and Kill Zombies how to complete a run choice for new players because they teach you the importance of momentum. You will hit the distance cap of your current fuel tank within minutes, but you will also learn the wave rhythm fast. Tank chassis, by contrast, let you brute-force the early waves, but they punish you at wave 16+ when bombers and sprinters combine to overwhelm your top speed.
For most players pushing past 10,000 studs in a single run, the hybrid chassis is the answer: a 3-block front (for blade reach) with a 2-block rear (for fuel capacity) and a small armor plate on the operator seat. The asymmetry keeps the weight forward where the blades need it and light at the back where the engine needs airflow.
Fuel, Engine, and Wheel Pairings
Parts only matter in combination, and the three parts that decide your real-world Build and Kill Zombies max distance are fuel, engine, and wheels. Get the pairing right and the same chassis will easily double your previous best run. Get it wrong and no amount of skill closes the gap.
Fuel Type Comparison
| Fuel Type | Burn Rate | Tank Size | Best Wave Range | Synergy |
|---|---|---|---|---|
| Standard | Medium | Medium | 1-10 | All-rounder |
| High-Octane | High | Small | 5-15 | Light chassis only |
| Extended | Low | Large | 10-20 | Heavy chassis, long runs |
| Bio-Fuel (event) | Variable | Variable | Event waves only | Hacker Event 2026 |
The Extended fuel is what most distance-focused players gravitate toward, and the reason is simple: a bigger tank means fewer fuel stops means more distance covered before the wave timer catches up. The trade-off is slower acceleration, which is brutal on a light chassis. High-Octane fuel, by contrast, is a speed demon that empties the tank in 8 minutes but lets a light Speedster outrun the wave timer indefinitely on flat terrain.
Engine Tier Comparison
| Engine Tier | Power Output | Weight | Fuel Efficiency | Best Pairing |
|---|---|---|---|---|
| Tier 1 (Starter) | Low | Light | Good | Speedster + High-Octane |
| Tier 2 (Sport) | Medium | Medium | Medium | Balanced + Standard |
| Tier 3 (Racing) | High | Heavy | Low | Hybrid + Extended |
| Tier 4 (Prototype) | Very high | Heavy | Very low | Tank only, boss farming |
Wheels matter more than most players think. Larger wheels roll over zombies and debris instead of getting stuck, but they also raise your car's center of gravity and make sharp turns risky. Smaller wheels grip better on slopes but get bogged down in the dense zombie clusters at wave 16+. The pairing that wins for distance runs is a medium engine, Extended fuel, and mid-size wheels on a hybrid chassis.
Run Rewards and Why Distance Multiplies Cash
Every run in Build and Kill Zombies ends at a reward screen that pays out three stacked multipliers: base cash per zombie killed, a distance bonus that scales with your final stud count, and a wave clear bonus that rewards every full wave you pushed past. The three stack multiplicatively, so a run that lands at 9,000 studs and clears wave 14 pays roughly four times more than a run that lands at 4,000 studs and clears wave 8, even if the total zombie count is similar.
Reward Multiplier Breakdown
| Reward Source | Base Value | Multiplier Trigger | Max Stacking |
|---|---|---|---|
| Zombie kills | 5-25 cash each | Wave tier (1.1x per wave) | Up to 3.5x at wave 20+ |
| Distance bonus | 1 cash per stud | Distance tier milestone | +50% at 5k, +100% at 10k |
| Wave clear bonus | 500 cash per wave | Consecutive clear (no skips) | +25% per 5 waves cleared |
| No-damage bonus | 1,000 flat | Zero durability loss on final block | One-time per run |
| Event bonus | 2x cash | Hacker Event 2026 active | Double base only |
The 2x Cash game pass at 179 Robux doubles your base cash but does not multiply the distance or wave bonuses. The 4x Permanent Luck pass at 229 Robux, on the other hand, indirectly boosts your rewards by giving you better part drops at the garage, which means better parts means longer runs means more of every multiplier. According to the developer's Build and Kill Zombies game pass listing, these are the only two paid advantages in the current shop, so a free-to-play player is not locked out of the distance meta, just at a slower progression curve.
For a deeper look at how to convert run cash into permanent upgrades and where to spend your Build and Kill Zombies money for the fastest distance gains, the money guide covers the garage roll priority and skill tree order. Most distance-focused players put their first 50,000 cash into skill XP rather than new parts, because the +10% fuel efficiency skill alone adds roughly 800 studs to every run.
Advanced Strategies for Pushing Past Wave 20
Wave 20 is the wall that separates casual players from the Build and Kill Zombies how to complete a run crowd. Everything up to that point is a tutorial: the waves are predictable, the zombie types are familiar, and a decent hybrid chassis will cruise through. After wave 20, the game shifts into a survival test that punishes inefficiency and rewards preparation.
The Three Phases of a Long Run
| Phase | Wave Range | Goal | Risk if You Stall |
|---|---|---|---|
| Sprint | 1-10 | Build distance lead, conserve fuel | Burn out before wave 11 spike |
| Grind | 11-18 | Maximize zombie kills for cash | Lose wave timer on first bomber wave |
| Endure | 19-25+ | Survive elites, push for King 1x1x1x1 | Run ends on mini-boss spawn |
The sprint phase is where new players get the most distance and experienced players get the least. Experienced players intentionally drive slower in waves 1-10 to maximize zombie kills per minute, because the cash-per-zombie ratio is highest at low wave tiers (a wave 3 walker pays more cash per second of effort than a wave 18 sprinter). The grind phase is where the Build and Kill Zombies how far can you go question actually gets answered: your distance per fuel tank should roughly double compared to your sprint phase because you are clearing more zombies per meter, not because the car got faster.
Mini-Boss and King 1x1x1x1 Tactics
The first mini-boss spawns at wave 21, and King 1x1x1x1 himself shows up as the event capstone during the Hacker Event 2026. Mini-bosses are slower than the surrounding horde but hit hard enough to one-shot a damaged block. King 1x1x1x1 has a stomp attack that covers the entire operator cabin, so you need either a fully armored front or a hit-and-run blade strategy. The hit-and-run approach is what most distance pushers use: drive past, slash with side blades, drift away, repeat.
Boss cooldowns matter for farming. According to community testing reported by players in late September 2026, the boss respawn timer after a King 1x1x1x1 kill is roughly 4 minutes, which means a single run can realistically clear the boss twice if you are efficient. Two boss clears per run is a major reward spike because King 1x1x1x1 drops gold-tier parts that feed directly back into the next run's chassis.
Skill Tree Priority for Distance Runs
| Skill Branch | Effect | Priority for Distance | Priority for Cash |
|---|---|---|---|
| Fuel Economy | +10% tank size per rank | High | Low |
| Engine Power | +8% top speed per rank | Medium | Medium |
| Blade Damage | +12% slash damage per rank | High | High |
| Luck | Better part drop rarity | Medium | High |
| Gold Roll (end) | Premium part rolls | Low (expensive) | High |
| Repair | +15% durability retention | High | Medium |
The full skill progression and the right Build and Kill Zombies upgrade priority for a distance-focused player is covered in the skill ranking guide, but the short version is: max Fuel Economy first, then Blade Damage, then Luck. Engine Power looks tempting but only matters if your chassis can actually use it, and most distance builds top out before the engine becomes the bottleneck.
Frequently Asked Questions
What is a good Build and Kill Zombies max distance for a new player?
A new player should aim for 3,000-5,000 studs in their first ten runs, which typically lands them around wave 8-10. That range is enough to learn the wave rhythm, try two or three chassis types, and start earning meaningful cash for garage rolls. Pushing past 5,000 studs consistently usually takes 15-20 runs of practice with the same hybrid chassis.
How many waves are in Build and Kill Zombies?
There is no hard wave cap; the game scales endlessly, with each wave adding more zombies and tougher variants. In practice, the meaningful milestones are wave 11 (sprinters arrive), wave 16 (bombers arrive), wave 21 (first mini-boss), and the Hacker Event 2026 capstone against King 1x1x1x1. Most free-to-play players top out around wave 25 because the cash reward curve outpaces their durability loss at that point.
How do I complete a long run without running out of fuel?
Pick Extended fuel over High-Octane, max the Fuel Economy skill first, and avoid idling your engine at the wave marker tile. Every second your engine runs while you are stopped costs roughly 0.3% of your tank, which sounds tiny but adds up to two lost minutes of distance over a 20-wave run. Coast in neutral when you can, and only throttle up to clear a dense zombie cluster.
What are the best Build and Kill Zombies run rewards to farm?
The highest reward-per-minute runs are wave 14-18 clear runs on a hybrid chassis with Extended fuel, because the zombie count is high but the elite types have not spawned yet. Event runs during the Hacker Event 2026 pay 2x base cash on top of the normal distance and wave bonuses, so an event run at wave 15 typically pays the same as a non-event run at wave 20 with a fraction of the risk.
Can I push my Build and Kill Zombies max distance further with paid game passes?
Yes, but the gains are smaller than most players expect. The 2x Cash pass at 179 Robux doubles your base cash but not the distance or wave multipliers, so a run that previously paid 10,000 cash now pays around 15,000 instead of 20,000. The 4x Permanent Luck pass at 229 Robux is the better long-term investment for distance because better part drops mean a stronger chassis means a longer run means more of every other multiplier stacking on top.