
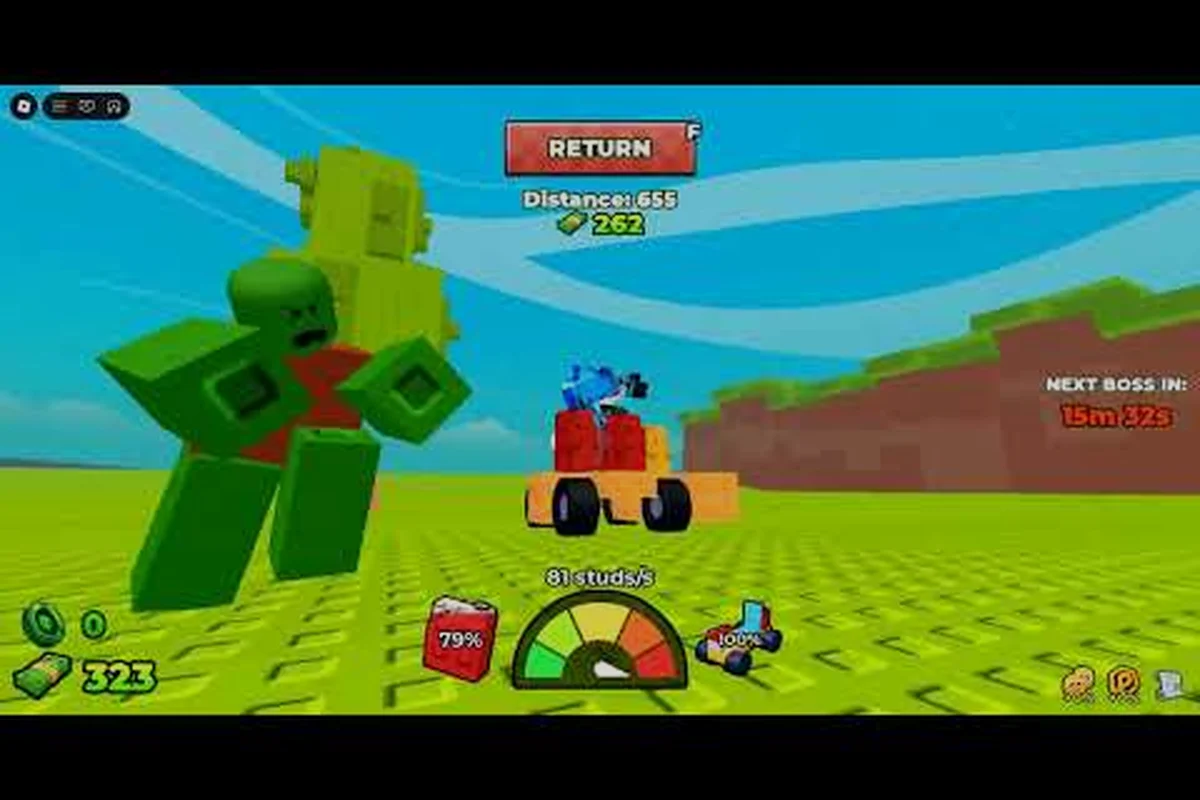
Finishing your first lap in Build and Kill Zombies feels great, but the real game starts the moment you re-enter the lobby with a pocket full of cash and a car that barely crawled past the first zombie wave. Knowing the right Build and Kill Zombies upgrade order transforms that confusion into a clear roadmap, so every roll and every credit pushes you closer to a hardier chassis rather than burning resources on dead ends.
This progression guide maps what to do after that first successful run, how your account progress carries forward, and where the long-term grind bends toward a voluntary reset. We will walk through the part-tier ladder, the skill tree path, cash sink prioritization, and the save-data rules that govern your Roblox account so nothing is lost between sessions.
For a complete visual breakdown of the optimal farming and upgrade sequence, check out this step-by-step Build and Kill Zombies guide on YouTube, which walks through each stage of the upgrade order in real time.
Reading Your Save Data and Account Progress
Before deciding anything, you need to understand what the game actually saves and what it throws away every time you rejoin. Build and Kill Zombies stores its state on the Roblox account, which means your rolls, your unlocked parts, your permanent skills, and your cash balance travel with you across devices. What does not carry over is the in-run distance record, the temporary build you assembled on the plot, and the fuel counter that resets when you press the green launch button.
What Persists Between Sessions
| Progress Type | Saved? | Notes |
|---|---|---|
| Cash balance | Yes | Stored on the account, available in the next lobby |
| Rolled parts inventory | Yes | Each unique part stays in your garage even if not placed |
| Permanent skill levels | Yes | Gold Roll Skill and related upgrades persist across runs |
| Gamepass perks (Rolls, Luck) | Yes | Tied to Roblox purchase, not session-based |
| Current plot build | No | Plot resets when you re-enter the lobby |
| In-run distance / wave count | No | Replaced by next run's telemetry |
| Fuel gauge | No | Always full at spawn, ends with out-of-fuel banner if car stalls |
Players who assume the wrong things get burned. One common rookie mistake is parking a half-finished car on the plot, expecting it to survive a server hop. It does not. The plot is a staging area, not a garage. Anything you leave on the ground when you leave the run evaporates, even if the same parts still sit in your inventory.
How the Garage Differs From the Plot
Think of the garage inventory as the warehouse and the plot as the loading dock. You pull parts out of the warehouse, arrange them on the dock, drive off, and the dock empties. This is why veteran players pre-stage their roll sessions before assembling: you want a clean batch of fresh parts to choose from when you commit a build. The Build and Kill Zombies first-run walkthrough from VendoPlus on YouTube walks through this exact loop, showing the CONFIRM prompt at the roll machines and the B key that drops you into Build Mode with whatever you have queued.
Build and Kill Zombies Upgrade Order After the First Run
Once you grasp the save model, the next decision is sequencing your spending. A clean upgrade order keeps your cash flowing back rather than bleeding on tier-1 parts you will outgrow in three runs. Below is the priority ladder most players settle into after their first successful lap, based on community testing reported across the player base.
The Priority Ladder
| Priority | Target | Why It Comes First |
|---|---|---|
| 1 | Gold Roll Skill | Permanent luck boost makes every subsequent part rarer on average |
| 2 | Fuel capacity / chassis | Without fuel, you cannot reach later zombie waves where the real cash lives |
| 3 | Engine power | More speed means more distance, which means more kill rewards per run |
| 4 | Weapon slots (front blades) | Front-mounted damage is the difference between scraping by and farming efficiently |
| 5 | Cosmetics / paint | Zero mechanical value; always last so the cash flow supports itself |
Starting with the Gold Roll Skill is the single highest-return decision in the game. According to community data, the roll luck multiplier compounds across every part you will ever pull, so a five-level head start on luck pays for itself within a few sessions. A deeper breakdown of skill costs and the optimal unlock path lives in the Gold Roll Skill guide, which maps the exact price curve against average session income.
What to Do Right After Your First Run
The moment you respawn in the lobby with your first paycheck, work through this short optimization loop before touching the launch button again: route your coins to the skill tree first, since Gold Roll Skill and similar permanent upgrades compound across every reset and out-value any single lucky part pull; then spend what's left at the common rolling machine, assemble a balanced chassis-engine-blade combo on your plot while stashing a backup inventory set, and only after both steps are done should you re-launch for a longer zombie run to convert that upgraded luck into account-wide progress.
-
Open the skill tree and dump the first cash chunk into Gold Roll Skill until the next level costs more than your current balance
-
Roll at least 10 parts at the common machine to seed your inventory with usable chassis, engine, and blade pieces
-
Assemble the best combination on your plot, but keep a backup set in your inventory for the next session
-
Press the green launch button and aim for at least double the distance of your first run before considering a reset
Skipping the skill tree to roll more parts is a tempting trap. Luck affects every roll you make afterward, so delaying the permanent upgrade to chase a single mid-tier part costs you more long-term rolls than you save.
Spending Cash Without Burning It
Cash management is where most intermediate players leak value. The game offers a steady stream of small sinks, and a clear hierarchy matters more than absolute amounts. The table below compares the cash efficiency of common spending categories, rated by how much run-distance you gain per unit of currency.
Cash Sink Comparison
| Spending Category | Short-Term Gain | Long-Term Gain | Recommended Phase |
|---|---|---|---|
| Gold Roll Skill | Low | Very High | From run 1 onward |
| Fuel upgrades | Medium | Medium | After first 3 runs |
| Engine power | High | High | Once you can afford 2-3 levels |
| New chassis types | Medium | Medium | Mid-game |
| Plot cosmetics | None | None | After maxing skills |
| Premium rolls (gamepass) | High | High | Only if you own the pass |
Notice that plot cosmetics sit at the bottom. They are visible, but they do not extend your runs, increase your luck, or improve your kill rate. Players who front-load cosmetics end up stuck at short distances because their cars lack the fuel and engine to clear the mid-game zombie swarms.
The middle of the ladder belongs to fuel capacity and engine power in roughly equal measure. Fuel alone extends your maximum potential distance, but a slow car burns through that fuel without reaching the rewarding late waves. Pairing the two upgrades in a 1:1 ratio, until both are at least halfway capped, tends to be the cleanest path forward.
Long-Term Goals and the Reset Question
The grind is not endless. At some point your parts will plateau, your skills will max, and the only meaningful jump left is a voluntary reset that exchanges current progress for a permanent multiplier on future runs. Knowing when to pull that trigger separates intermediate players from veterans.
The Reset Decision Matrix
| Signal | What It Tells You | Recommended Action |
|---|---|---|
| All skills maxed | Permanent buffs are exhausted | Begin weighing a reset |
| Rolls only duplicate parts | Inventory is saturated | Reset for the luck multiplier |
| Runs cap at the same wave | Distance plateau | Reset to break the wall |
| Cash income flatlines | No more sinks worth buying | Reset is the next big payoff |
| Gamepasses still active | Pass bonuses persist through resets | Reset is essentially free |
The progress reset in Build and Kill Zombies is not a punishment. It is the late-game progression mechanic. When you reset, your cash and parts clear, but your gamepass perks (Rolls, Luck boosts) and your permanent skill levels stay. The reward is a permanent multiplier on all future rolls and cash, which is the only way to push past the tier-5 part ceiling. The full reset procedure, including the in-game prompt and any group-bonus requirements, is documented in the reset progress guide.
Setting Three-Month Account Goals
A practical long-term target looks like this: a Gold Roll Skill milestone (level 10 within ~30 days) lets you re-roll chassis and weapons at premium odds, while maxing the engine and fuel tracks converts every extra second of wave survival into passive distance progress. Hitting tier-3 chassis status before the first reset is critical because the luck multiplier amplifies returns on already-rolled parts — resetting at tier-1 or tier-2 wastes the multiplier's bonus on weak base stats, whereas a tier-3 chassis with maxed fuel keeps its upgraded core through the save-data wipe, preserving hundreds of thousands of in-game cash that would otherwise be ground out again from wave 1.
-
Month 1: Reach skill level 10 on Gold Roll Skill, own at least one tier-3 chassis, and consistently clear wave 5
-
Month 2: Max the engine and fuel tracks, unlock the front-blade weapon slot, and start saving cash for the reset window
-
Month 3: Trigger the first reset, re-roll with the new luck multiplier, and break the previous distance record within five runs
Players who skip the multi-month plan tend to either burn out before the reset or reset too early, throwing away skill levels they could have kept. The 90-day window also lines up nicely with Roblox's typical update cadence, so a reset right before a major patch lets you benefit from both the multiplier and any new parts the update adds.
Cash-to-Robux Strategy and When to Spend Real Money
Build and Kill Zombies lets you buy Robux-based gamepasses for permanent luck and roll boosts, but the value curve is steep. Spending Robux before your skill tree is at least level 5 is a poor trade, because the permanent luck from skills would have stacked on top of the pass luck. The full cash-to-Robux ratio and the break-even math for each pass tier is covered in the 100k cash and value guide.
The upgrade order below assumes your skill tree is already at level 5+ — buying gamepasses before that milestone is a wasted trade, as discussed above — and treats Robux as a late-game multiplier layered on top of, not replacing, your permanent luck and roll bonuses. Read the full Robux section first, then return here to plan the actual sequence of gamepasses, rebirths, and skill-point dumps.
-
Buy the Rolls gamepass only after your Gold Roll Skill is at level 8 or higher
-
Buy the Luck gamepass only if you plan to reset at least twice in the next 60 days
-
Skip cosmetic passes until the gameplay loop is fully maxed, because cosmetics do not compound
Players who front-load Robux often end up rebuying the same effective bonuses after a reset, since the multipliers reset and the pass value has to be earned again. Holding the wallet until the skill tree is mature protects the long-term value of every purchase.
Common Pitfalls Between First Run and First Reset
Even players who read every guide on build and kill zombies upgrade order hit the same rough patches, because the upgrade order changes subtly after the first reset once permanent skill slots and plot unlocks start overlapping. The table below condenses the most common traps between run 1 and your first reset — each row pairs the symptom you will actually see in-game (out-of-fuel banner, duplicate parts, wasted permanent levels) with the specific sequencing fix, so you can cross-check your own build and kill zombies account progress against what the community has already documented.
| Pitfall | Symptom | Fix |
|---|---|---|
| Rolling before buying skills | Slow luck growth, duplicate parts | Always skill first, then roll |
| Spending on cosmetics early | Cash starvation at run 5 | Cosmetics last, always |
| Building on the plot without inventory backup | Lost parts on server hop | Keep a backup chassis in inventory |
| Ignoring the fuel cap | Out-of-fuel banner at wave 3 | Buy fuel upgrades every other run |
| Resetting before skills max | Wasted permanent levels | Wait for full skill saturation |
| Playing solo without group perks | Missing the free chest bonus | Join the Zombie Car Crusher group for the daily chest |
The free chest from liking the game and joining the Zombie Car Crusher group is one of the easiest gains in the entire game, and players who skip it are leaving guaranteed value on the table. The community-reported reward includes a small but reliable part drop, and combined with the daily login bonus it gives early accounts a steady roll source before the cash-based rolls become affordable.
Drive Settings and Run Quality
Your upgrade order matters less if your car cannot steer. The handling sensitivity, camera angle, and Q/E controls all affect how much distance you actually clear per run. A few minutes spent tuning the settings can double your effective run length without spending a single credit. The optimal keybinds and sensitivity values are mapped in the best settings guide, which complements this progression plan with the driving-side details.
Frequently Asked Questions
What should I upgrade first in Build and Kill Zombies after my first run?
The Gold Roll Skill is the highest-priority upgrade because it permanently boosts luck on every roll you ever make, compounding over time. After that, focus on fuel capacity and engine power in a 1:1 ratio so your car can reach the late waves where cash rewards scale up. Weapons and chassis types come once the core mobility stats are at least halfway capped.
Does my progress save between sessions in Build and Kill Zombies?
Yes, the game stores cash, rolled parts, permanent skills, and gamepass bonuses on your Roblox account, so they follow you across devices and server hops. Your current plot build, the in-run distance, and the fuel gauge do not save, because those are session-specific and reset every time you re-enter the lobby.
When is the right time to reset progress in Build and Kill Zombies?
Reset only after your Gold Roll Skill and other permanent skills are maxed, because the reset wipes cash and parts but keeps your skill levels. The reset grants a permanent luck and cash multiplier that breaks the tier-5 part plateau, so triggering it too early throws away skill levels you could have kept.
What are the best long-term goals for a new account?
A solid three-month target includes maxing the Gold Roll Skill, owning at least one tier-3 chassis, clearing wave 5 consistently, and triggering a single reset that breaks the previous distance record within five runs. Gamepasses are most valuable once skills are at least level 8, so plan Robux spending around that milestone rather than at account creation.
Can I play Build and Kill Zombies solo without losing progress?
Yes, solo play saves to the same account data as public servers, so your cash, parts, and skills are unaffected. Joining the Zombie Car Crusher group still unlocks the free daily chest even in solo mode, and the gamepass perks function identically regardless of whether you run private or public servers.